Follow Our MINI Expert Step-by-Step Replacing a Harmonic Balancer for Gen1 Cooper S Models
In this video we show a badly damaged OEM crank pulley (harmonic damper/balancer) being removed from a GEN1 MINI Cooper S (supercharged). We then install a high quality aftermarket damper from MiniMania.
These balancers fit the following vehicles:
2002-2006 R53 MINI Cooper S Hatchback
2005-2008 R52 MINI Cooper S Convertible
Transcript
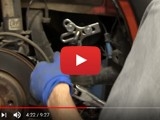
Hi guys, it's Brendan from Mini-Mania again and we are again at Ryan G&W down in Auburn, California. And today, we are going to replace a harmonic balancer on a Cooper S. If you follow along, we'll show you the steps involved in doing just that thing. along, we'll show you the steps involved in doing just that thing. Part number will be down in the description below, so take a look down in the more info section, comment sections, everything else, and we'll show you how to install and well to remove and then install a harmonic balancer. This is actually our aftermarket balancer and the part number will be below and we're going to do that and the part number will be below.
And we're going to do that right now. Over in high in the air. So, in order to get at that part of the engine, you have to remove right front wheel and other things. But start with the right front wheel. Other things, namely the liner. The liner. A few of the little... and one up there. One screw. Okay.
And... and another under there. They're everywhere. They're everywhere. You'll know when it doesn't want to come out, it's probably still attached somewhere. There's a balancer by the way. We now have access. We've already used our tool up here and pinned the tensioner, so we can remove the belt. The belt's just being tucked away now. The belt is just being tucked away now. Inspect it. Inspect it and it's going to be replaced most likely. Alright.
15mm on the crank pulley. Impact socket. Practice what I preach, right? Blue Loctite. Blue Loctite on a 15mm bolt. That looked easy with a 1000lb gun, but that bolt is very tight. Going back on 85ft lbs? 115Nm, so whatever that converts to. And you're just going to kind of use more of a generic type puller? Yeah, I'm going to show you how to do it with a generic one because you probably don't want to buy the factory mini one.
This is a standard 3 jaw harmonic balancer puller. And the various bolts. This is actually part of the factory mini tool that lengthens the stud. You can use any bolt that has the same thread pitch as the crank bolt. If you're really creative you could use a crank bolt. If you're really creative you could use a crank bolt. You're going to use M6x10 bolts, thread into the bouncer. Three of those. This is just to let people know that it's possible to do it without the factory tool. it without the factory tool. My tool is in for service because it got bent.
But the threads pulled out of it trying to get one out so yeah they can be very stubborn. So pre-tension that, make sure that all your It's a breaker bar so there's lots of leverage you can get on that. Lots of torque. I'm twisting the bolt into the crank so once that bottoms out then the port will start working. So I'm just going to try to rotate that. You may have to try to hold it. I'm going to try to rotate it. I'm going to try to hold it.
I'm going to try to rotate it. I'm going to try to rotate it. I'm going to try to rotate it. I'm going to try to rotate it. I'm going to try to rotate it. I'm going to try to rotate it. I'm going to try to rotate it. I'm going to try to rotate it. I'm going to try to rotate it. I'm going to try to rotate it.
I'm going to try to rotate it. I'm going to try to rotate it. I'm going to try to rotate it. I'm going to try to rotate that. I may have to try to hold the puller to keep the crank from turning. It's getting painful. It's a very large, very large, high-crank. pair of channel locks. You can see it. Okay, now we have to get it back in here.
Yeah, that should be it. I don't think it's too bad. So you can see the backside here with all this shiny, you can see there where it was cutting into the timing cover all the way around. So here you can actually see the balancer pulled away. So here you can actually see the balancer pulled away. This should be one solid piece. Oh yeah, yeah. So there you go. There you go. There's that's what's wrong with the rubber. It's totally gone. Nothing left.
Supposed to be vulcanized together or whatever. And this has a very distinct nasty smell. Yeah. Slipping and burning. So she definitely heard that then, right? Yeah, she toed it in for this. Yeah. she toed it in for this. Yeah that will free spin this pulley around here which is the belt staying still while this spins inside of it. Alternator light, supercharger not building boost, this car was overheating because the water pump wasn't turning through the blower. That's what you get.
P1688 fault code can be present for boost plausibility code okay can be present or boost plausibility because the blower is not turning even though the engine is what to make of that it thinks it has a bad supercharger you just really have a bad tensioner I mean a bad a bouncer not spinning yeah certain people are work like a charm yeah it really did that came right off That came right off, absolutely. Yeah, seems fairly painless. And we hadn't mentioned actually that this is an R53. This is a Gen 1 Cooper S.
This particular one happens to be a convertible. Yeah, you're getting there. We got a couple of bolts in there and we're just going to see if we can suck it onto the end there. The heating helped it a little bit, but didn't get it all the way on, so we're going to try The heating helped it a little bit, but didn't get it all the way on, so we're going to try to set it on with a bolt. So you got it enough now that you can put the factory bolt in and drive it home? Drive it home. Okay.
Tighten it down, pull it back out, lock-tight it. Okay, we were just kind of using a this, we had different spacers on it, we used a socket, we used stuff and now it's on. Now you have a nice gap here clearing the timing cover before that was grinding into there. It was just coming apart and And that is how it's done.