
| Orig. Posting Date | User Name | Edit Date |
| Dec 9, 2015 08:59AM | swindrum | |
| Dec 9, 2015 08:48AM | Hunter2 | |
| Dec 9, 2015 08:41AM | Spitz | |
| Dec 9, 2015 08:14AM | smurf | |
| Dec 9, 2015 07:24AM | Hunter2 | |
| Dec 8, 2015 10:14AM | Spitz | |
| Dec 8, 2015 09:02AM | Hunter2 | |
| Dec 8, 2015 03:14AM | Hunter2 | |
| Dec 7, 2015 09:15PM | Spitz | |
| Dec 7, 2015 08:17PM | Hunter2 | |
| Dec 7, 2015 04:53AM | Dan Moffet | |
| Dec 6, 2015 06:58PM | Spitz | |
| Dec 6, 2015 06:13PM | Hunter2 | Edited: Dec 6, 2015 07:10PM |
| Dec 4, 2015 10:31AM | Spitz | |
| Dec 4, 2015 09:50AM | Hunter2 | Edited: Dec 4, 2015 09:59AM |
| Dec 4, 2015 06:24AM | Spitz | |
| Dec 4, 2015 01:02AM | dimitris | |
| Dec 3, 2015 06:08PM | Hunter2 | |
| Dec 3, 2015 10:45AM | Dan Moffet | |
| Dec 3, 2015 07:19AM | Hunter2 |

|
Total posts: 1456
Last post: Jan 31, 2022 Member since:Sep 8, 2003
|
Cars in Garage: 1
Photos: 186 WorkBench Posts: 0 |
|
You guys are really cracking on with this!
Nice work ![]()
Sean Windrum
1996 MGF VVC
1970 1275 GT Racer
66 Austin Countryman
63 997 Cooper (Under Construction)
63 MG 1100
|
|
Total posts: 6469
Last post: Sep 29, 2022 Member since:Nov 2, 2006
|
Cars in Garage: 4
Photos: 1354 WorkBench Posts: 2 |
|
Yes SMURF - and the portion in the tunnel remains.
No SPITZ - wide sills were removed by previous resto work before I got the shell as evidenced by the drilled out spot welds in the old floors...I assume they were used when the two halves were united at the A pillar, floor & sills. I do have a pair of new early outer sills/rockers. I opted not to use them.
|
|
Total posts: 13978
Last post: Jan 15, 2024 Member since:Jan 22, 2003
|
Cars in Garage: 4
Photos: 381 WorkBench Posts: 1 |
|
So did your Woody have the smooth outer sills also?... I'll have to post a pic of mine
"Everybody should own a MINI at some point, or you are incomplete as a human being" - James May
"WET COOPER", Partsguy1 (Terry Snell of Penticton BC ) - Could you send the money for the unpaid parts and court fees.
Ordered so by a Judge
|
|
Total posts: 1959
Last post: Sep 5, 2020 Member since:Jul 13, 1999
|
Cars in Garage: 0
Photos: 0 WorkBench Posts: 0 |
|
Did your wagon have this floor extension panel ( in black)? My late 61 tinnie has std. Sedan plus this extension to make up the floor

|
|
Total posts: 6469
Last post: Sep 29, 2022 Member since:Nov 2, 2006
|
Cars in Garage: 4
Photos: 1354 WorkBench Posts: 2 |
|
Spitz...yes, and we drilled plug weld holes for that purpose...
I stopped early in the shop yesterday to get cleaned up for a party...but what a day fitting the heel board.
1st, the Woody shell is 54 1/2 years old.
2nd, the new rear sub frame, new heel board & new half floors are very much after market.
The good news, John got the second half floor fully butt welded and welding ground...before I showed up with the new subbie, trunions and all.
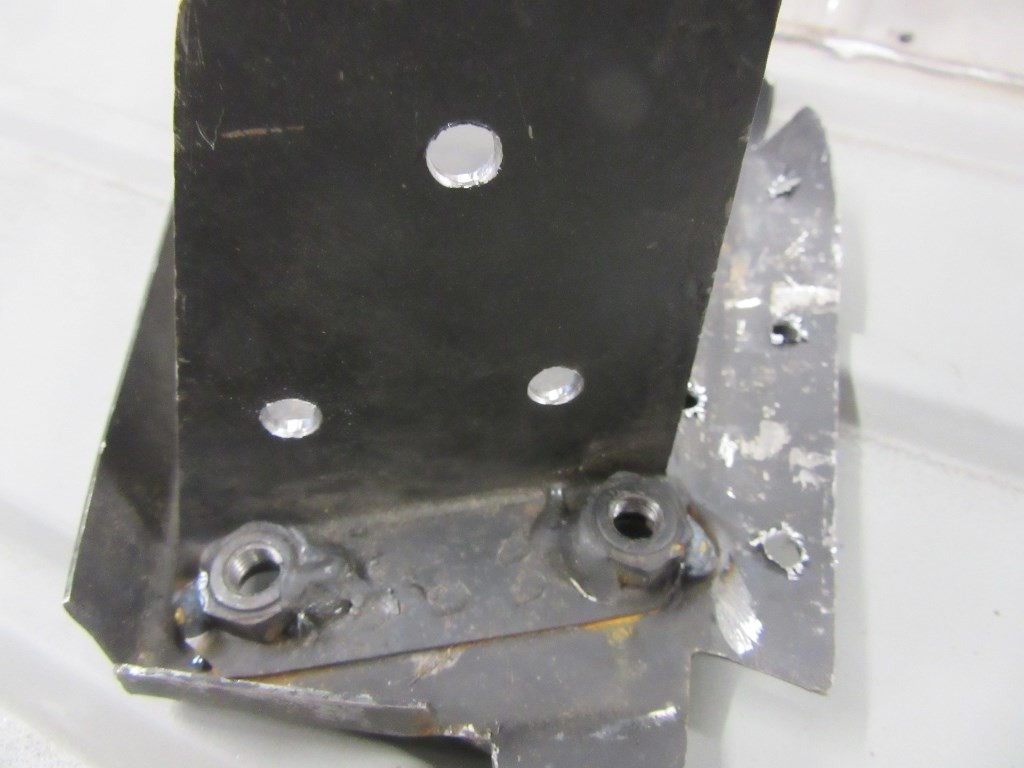
More good news, after much sweat, opening up of flaps, trimming and fiddling we got the heel board to a place where it could be installed. All plug weld holes drilled - 56 alone on the heel board.
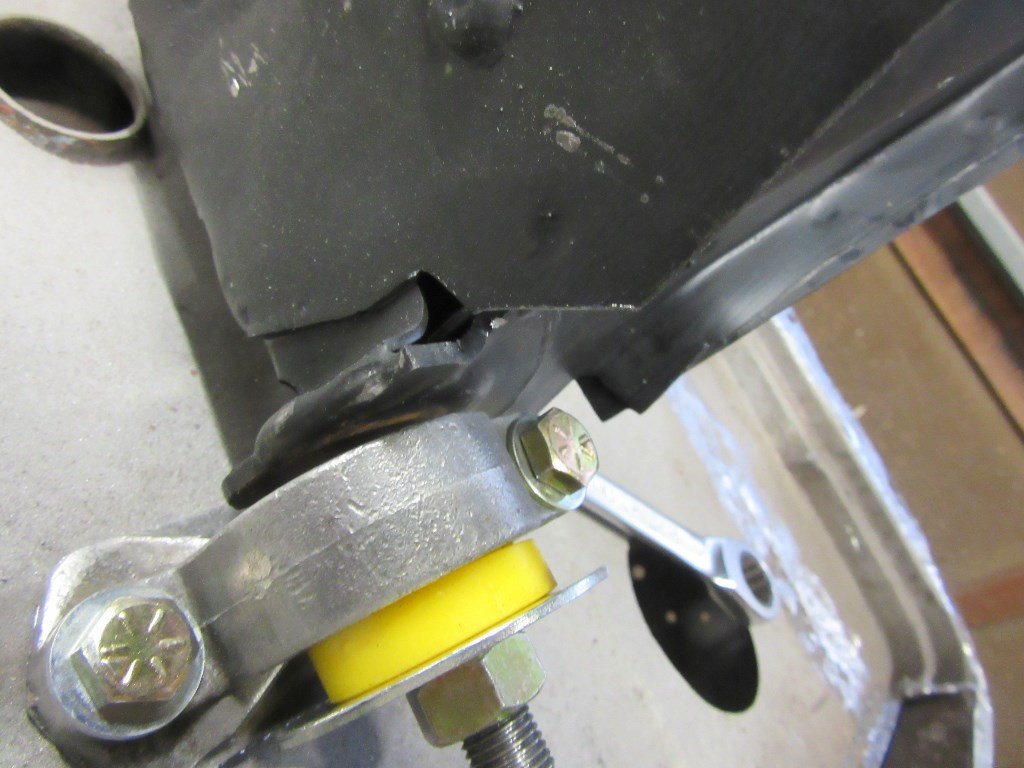
The rear subbie mated to the heel board but with the neoprene bushes would not locate in the threaded flats, so took out the inner bushes to locate the rear trunions (all of this only to finesse the new heel board).
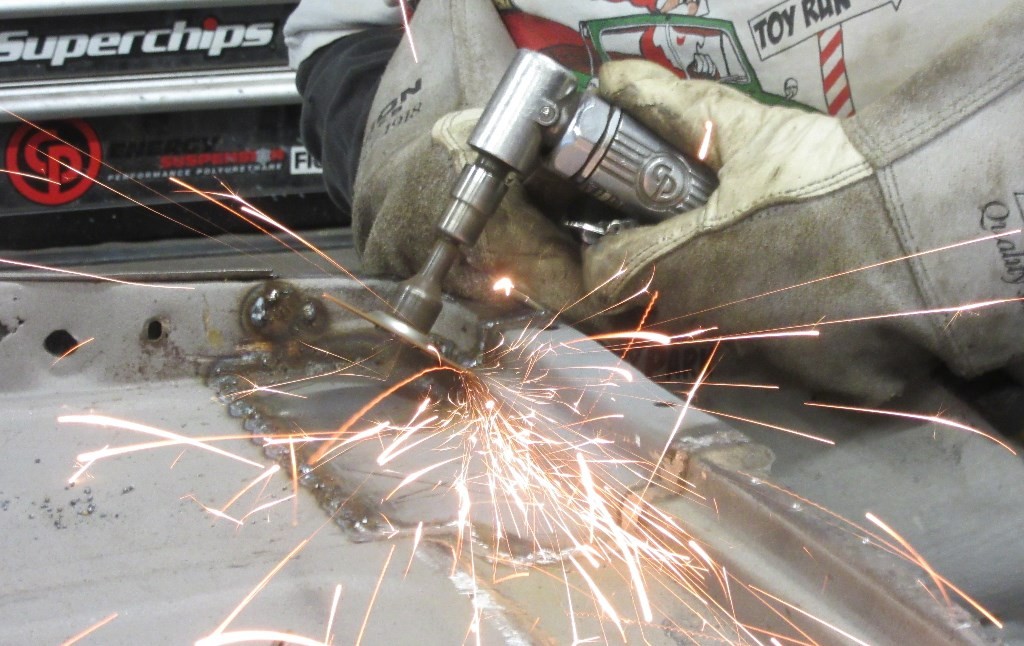
Heel board flaps needed pounding out, flange needed trimming as did the inner sills...but eventually we had the heel board in place...with the flaps flattened, we took the opportunity to add 2nd welds to the captive nuts, held firmly with bolts run through before welding.
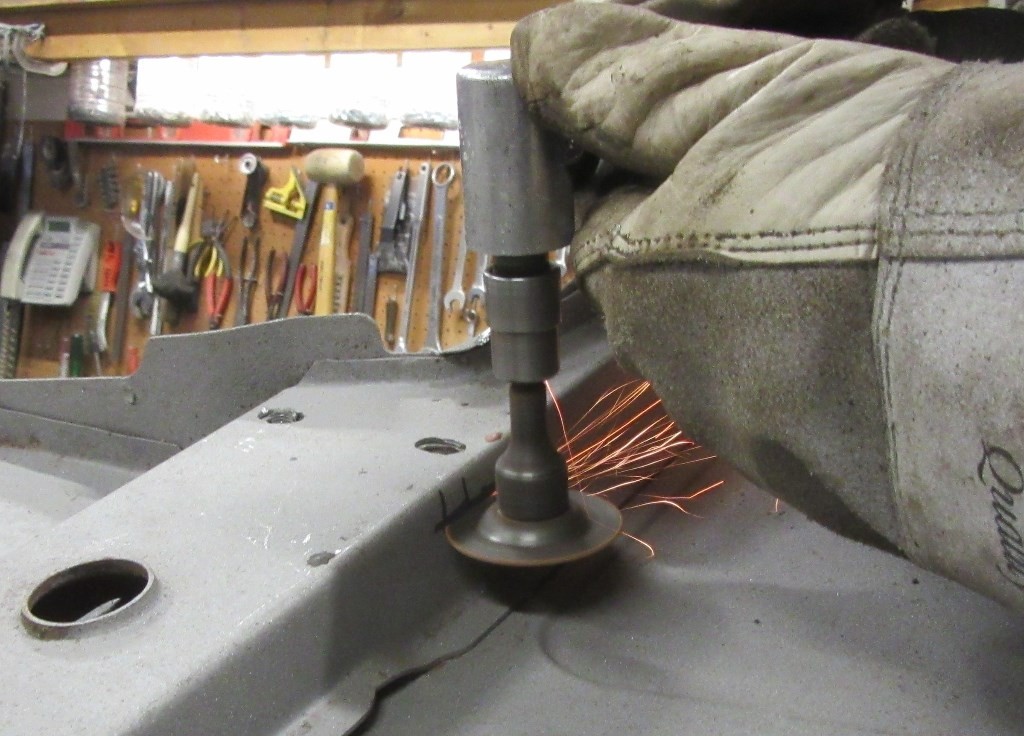
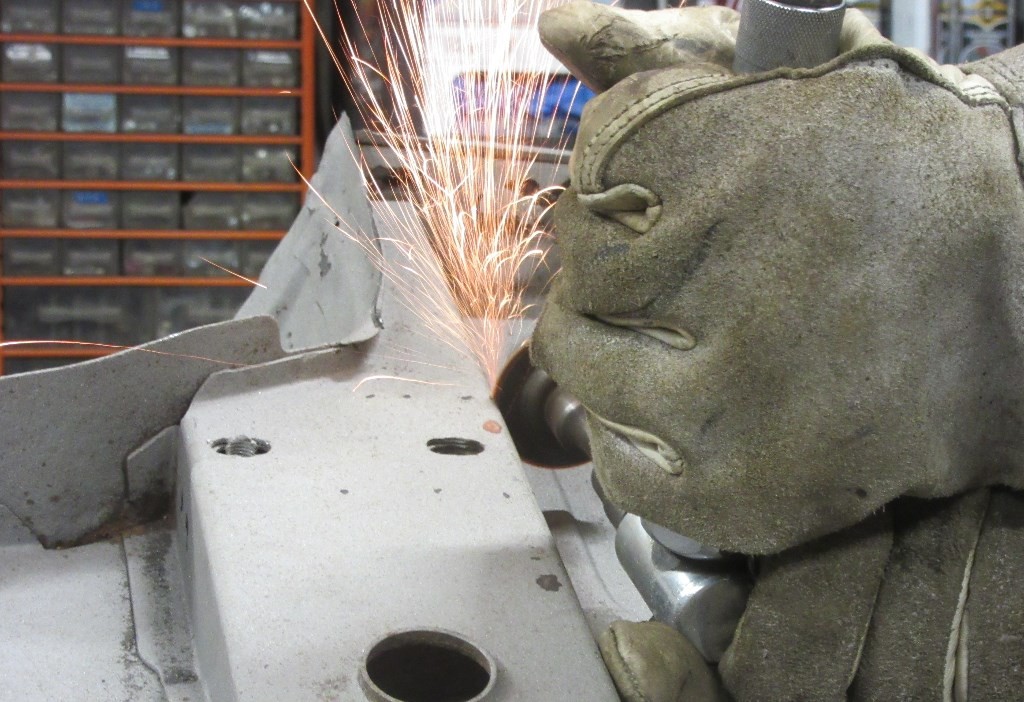
The genius of panel makers (well at least Hadrian) welding outer sills/rockers to floor panels is flawed. We had to slice the lip and vertical face, drill out two spot welds and peel back the sill to allow plug welding of the heel board to the inner sill. To be welded up afterwards.
Soon ready to go rightside up!
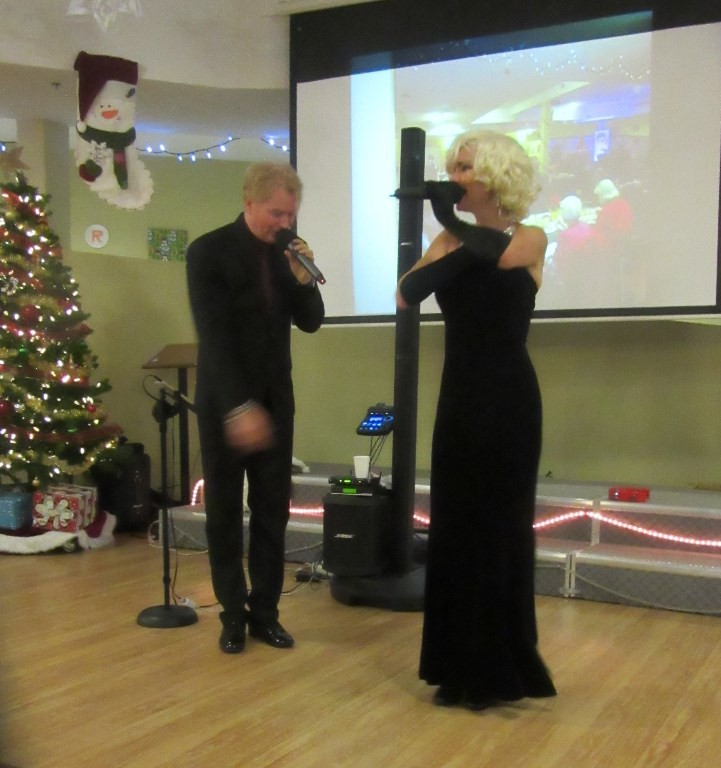
Oh, 'Marilyn Monroe' ended up in my lap twice at the care home Christmas Party!!
|
|
Total posts: 13978
Last post: Jan 15, 2024 Member since:Jan 22, 2003
|
Cars in Garage: 4
Photos: 381 WorkBench Posts: 1 |
|
Thanks for posting pics and explanation...helpful
When welding the rear of the floor, does it need to be welded from the top also? ( under the rear seat area ) With the van, if I were to do rear floors....there is no access because of the load bed
"Everybody should own a MINI at some point, or you are incomplete as a human being" - James May
"WET COOPER", Partsguy1 (Terry Snell of Penticton BC ) - Could you send the money for the unpaid parts and court fees.
Ordered so by a Judge
|
|
Total posts: 6469
Last post: Sep 29, 2022 Member since:Nov 2, 2006
|
Cars in Garage: 4
Photos: 1354 WorkBench Posts: 2 |
|
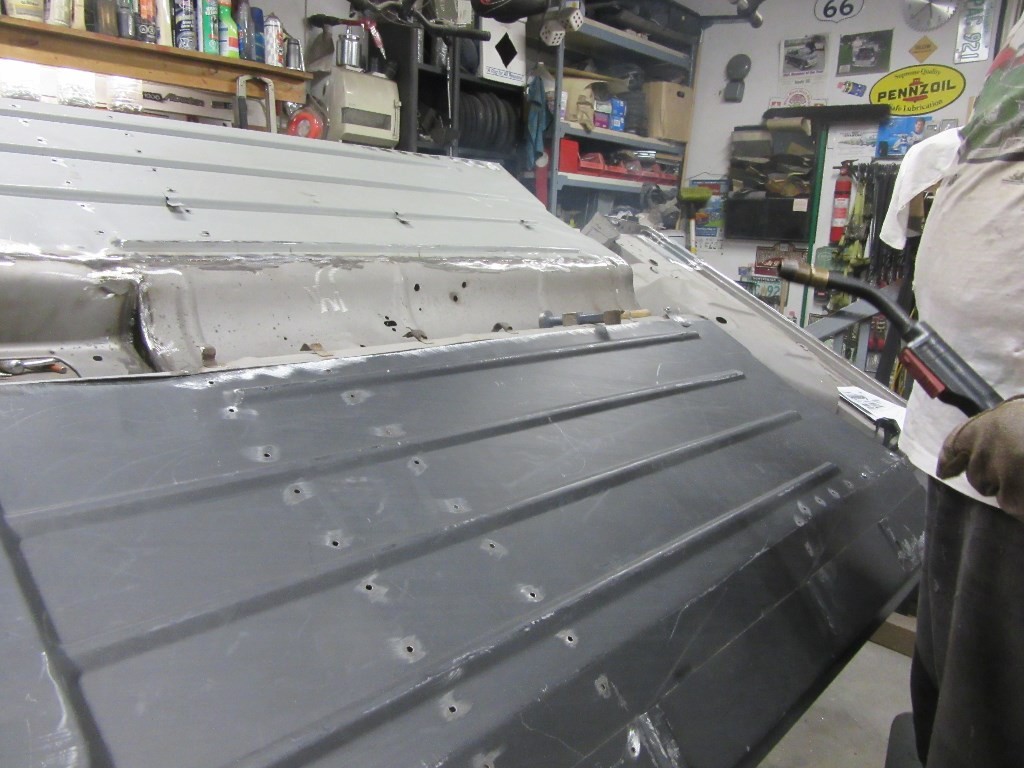

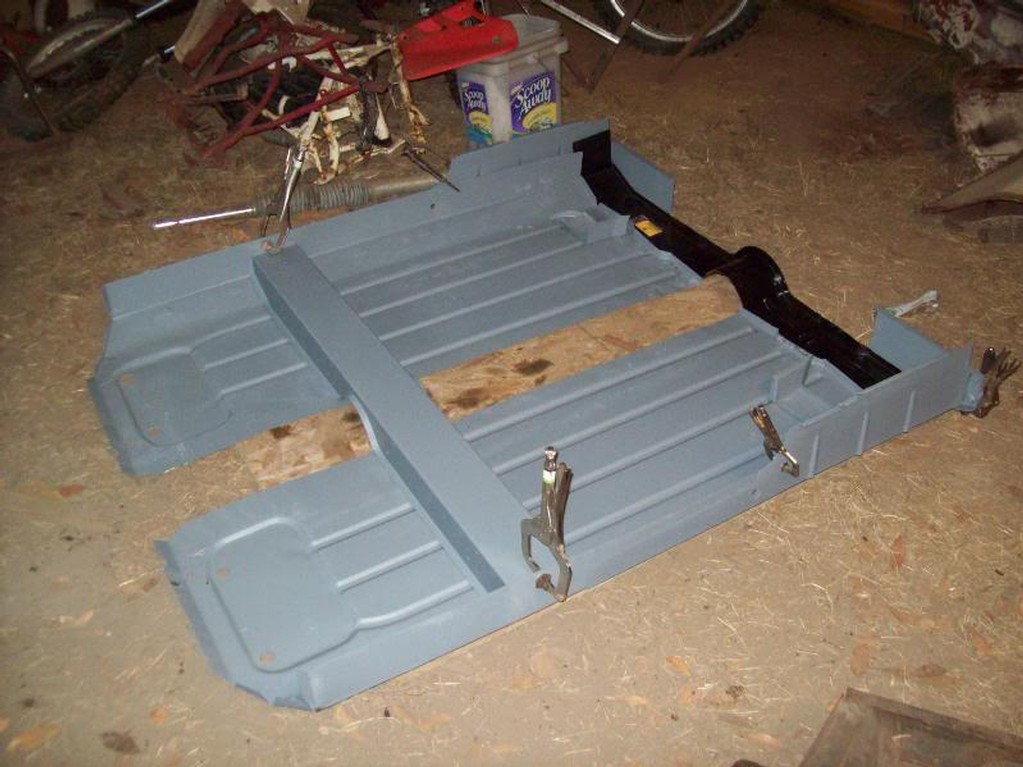
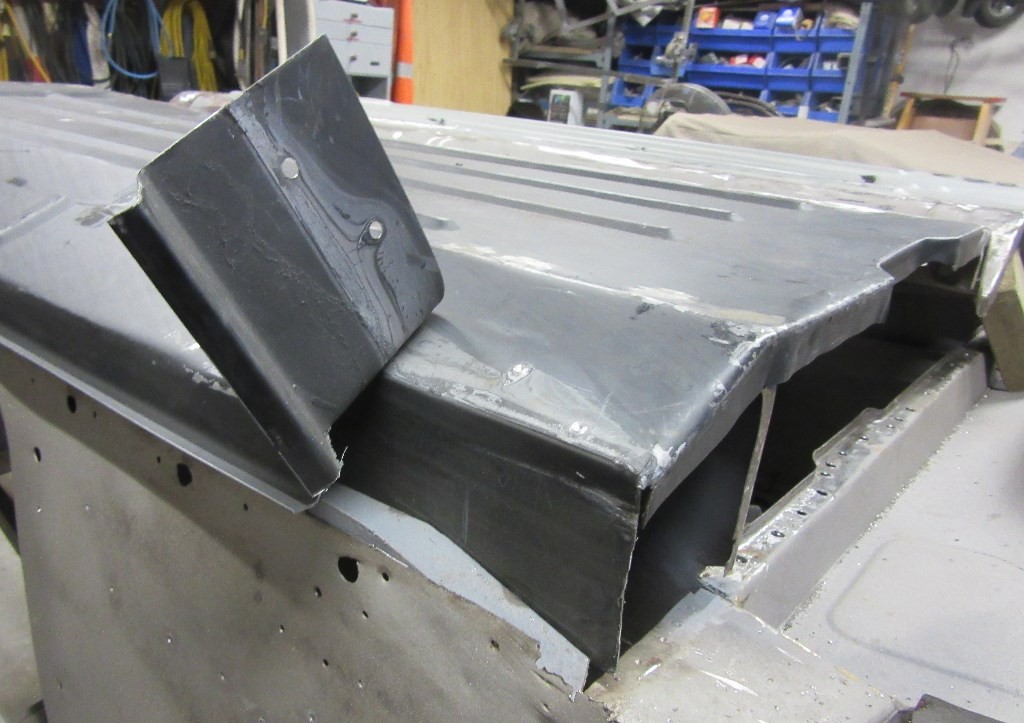
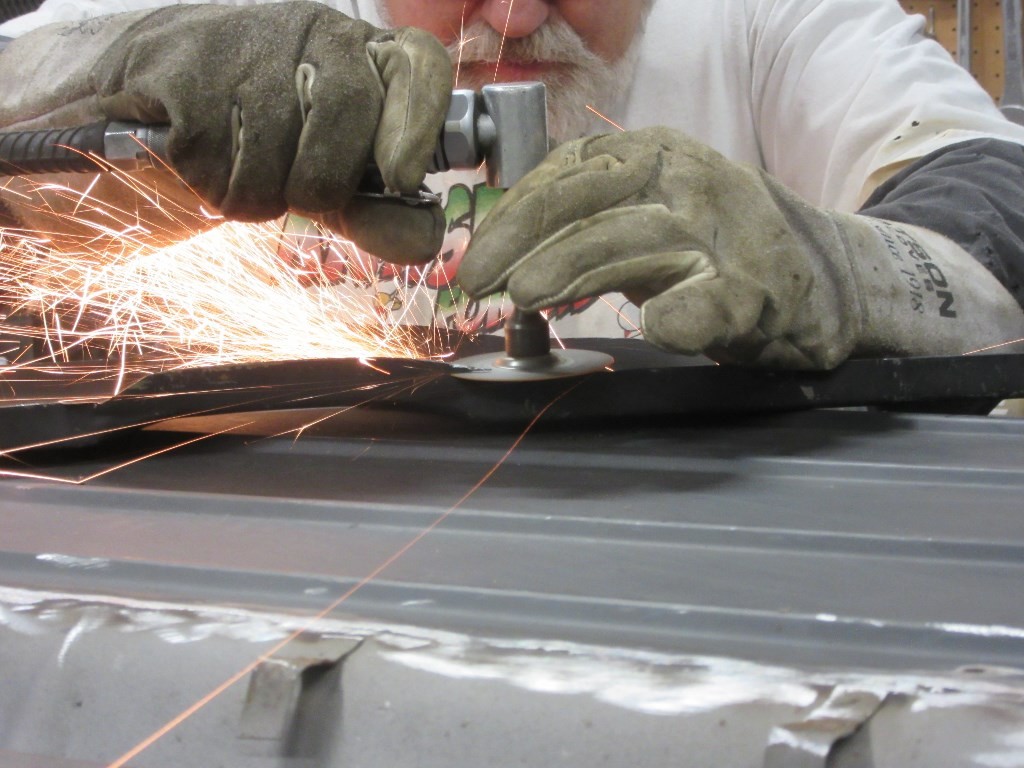
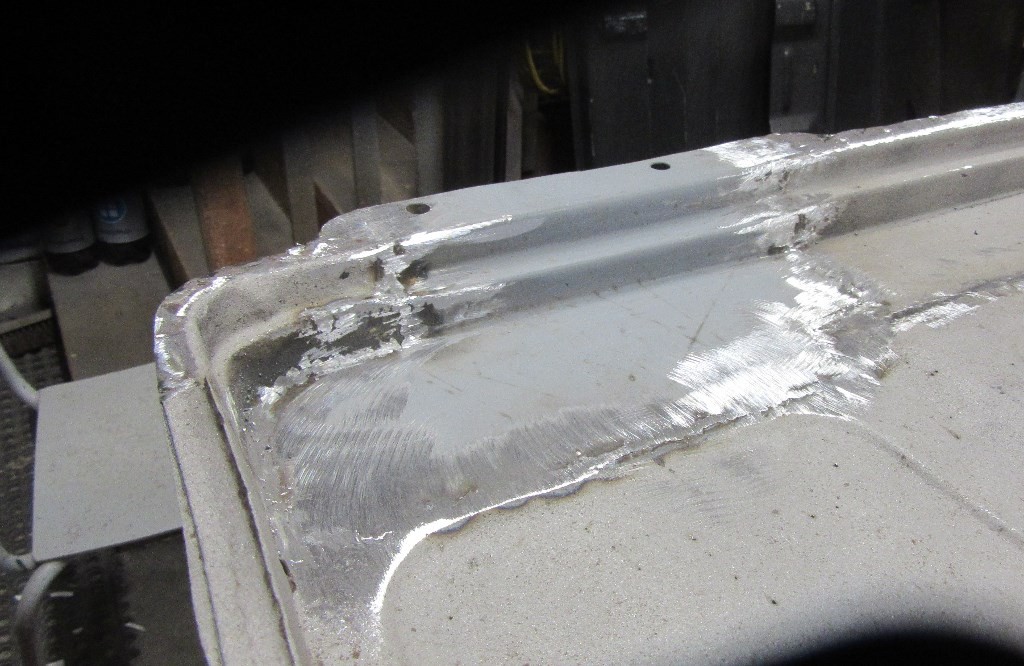
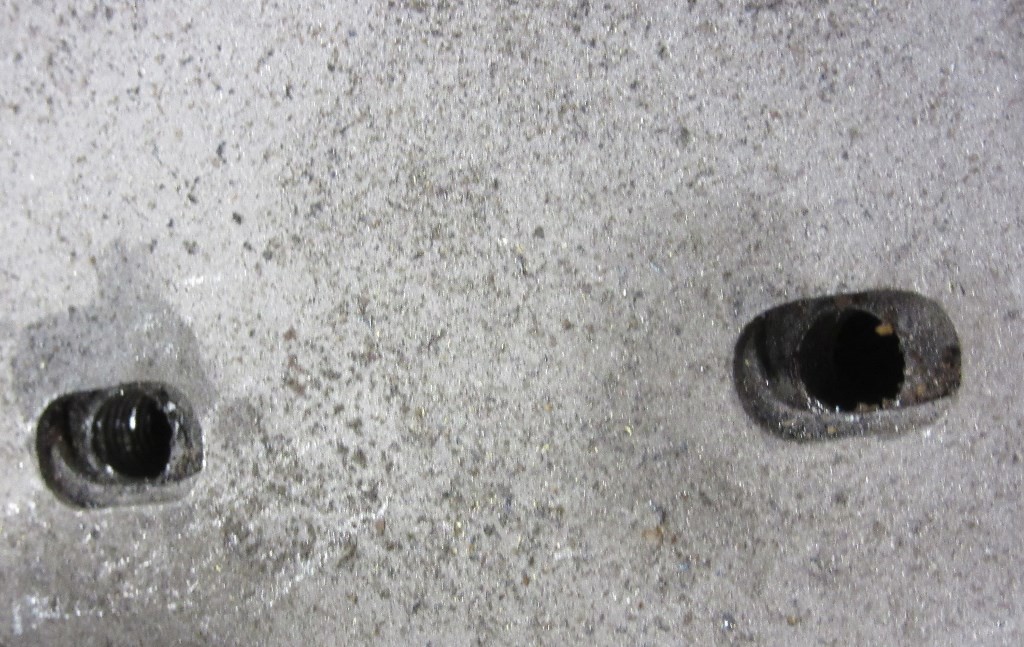
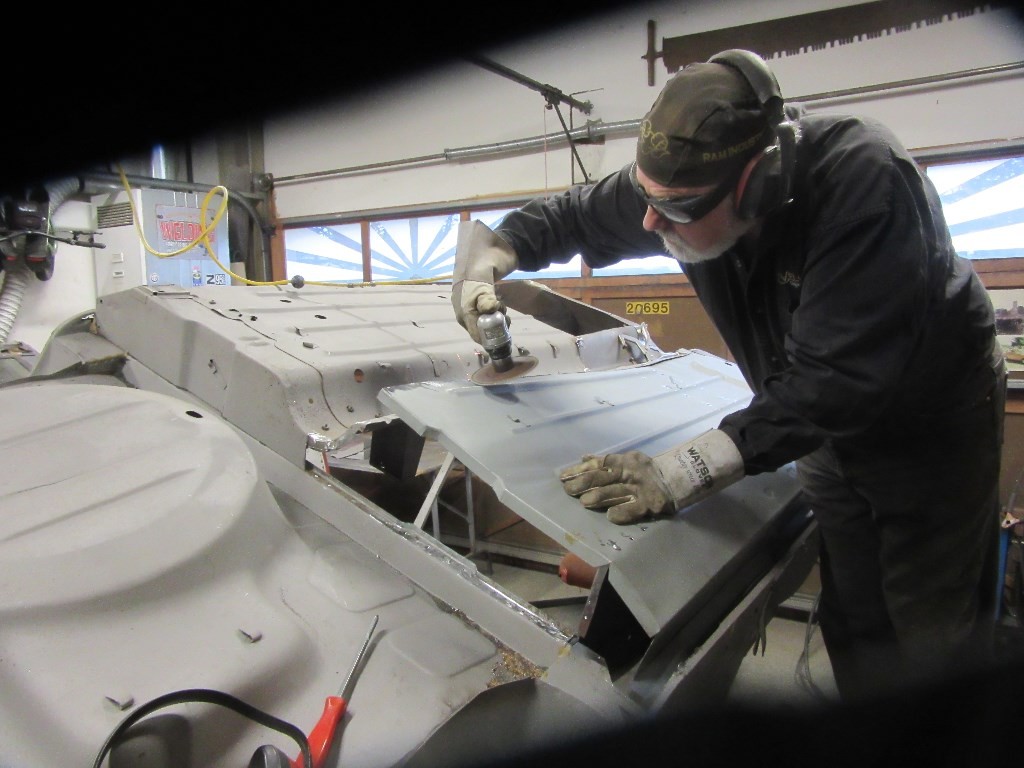
Spitz, the floor panel also needs to be prepared for plug welds if those are going to be used to weld to the lower lip of the rear parcel bins and the new crossmember.
We also needed to see a few small repairs to the bottom lip of the parcel bins (not much lip to begin with) and primed the clean lip, then marked weld locations after floor replaced, dusted primer off the marked locations with sander...ready to weld on final assembly. Same process of priming, marking and dusting off primer up front with the toe board.
Photo 1 - shows the plug weld holes for the new crossmember.
Photo 2 - includes the series of plug weld holes for the bottom of the parcel bin (lower right hand side of pic).
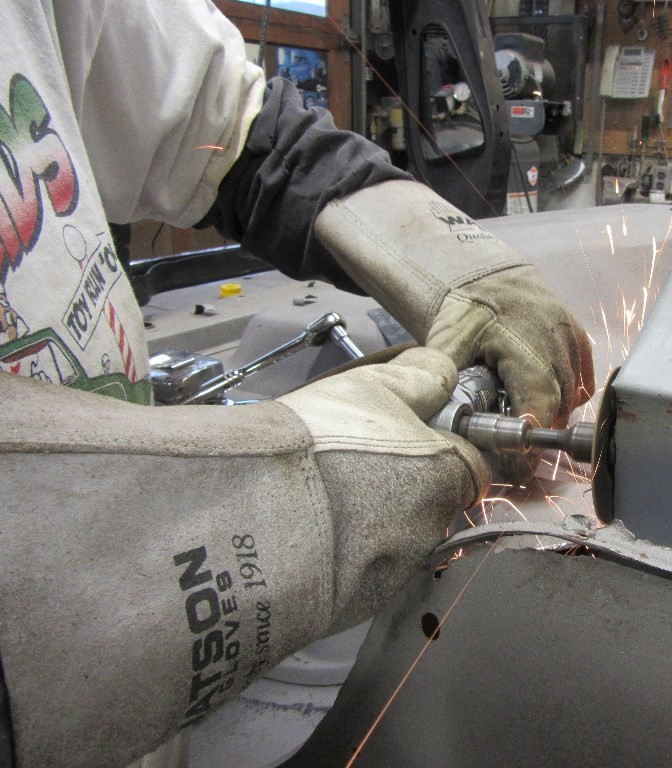
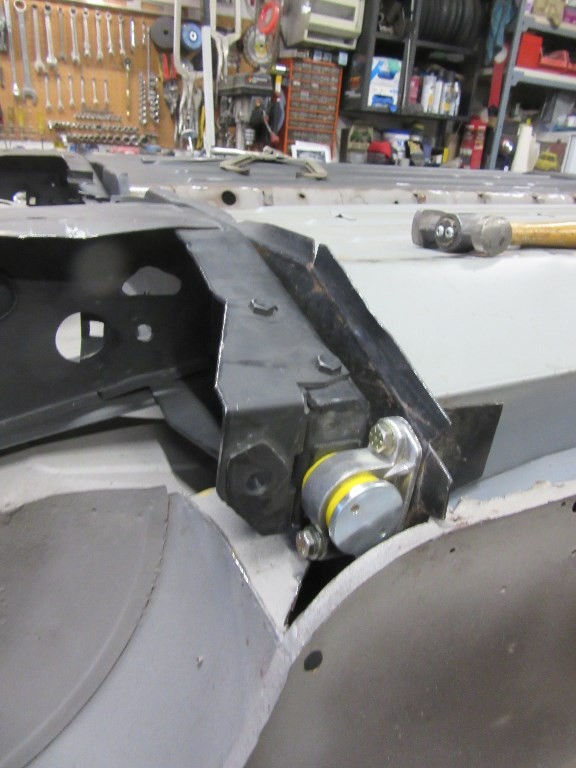
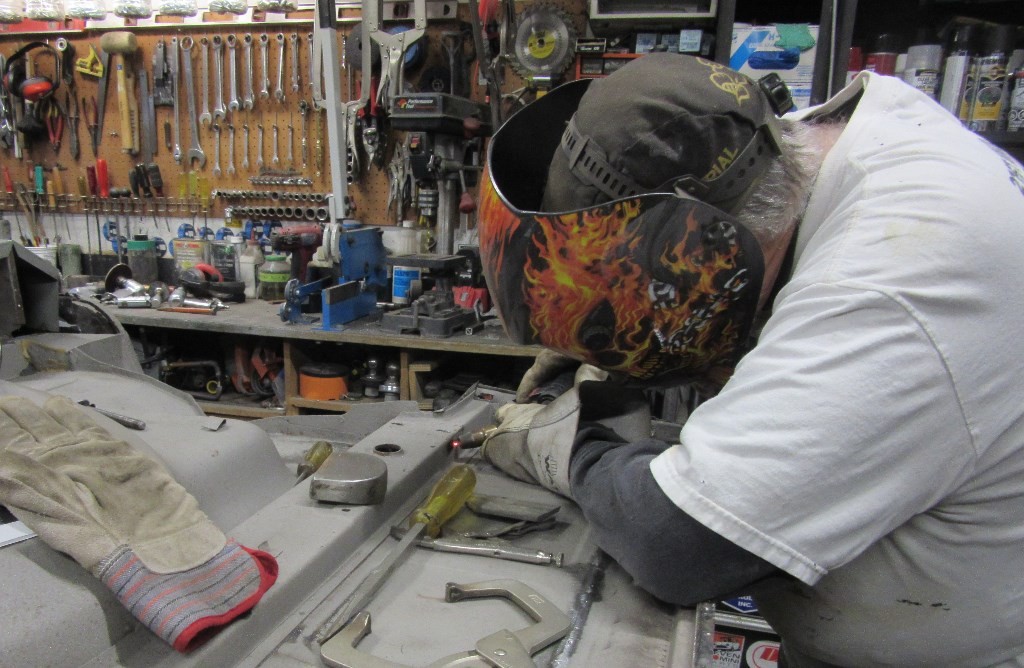
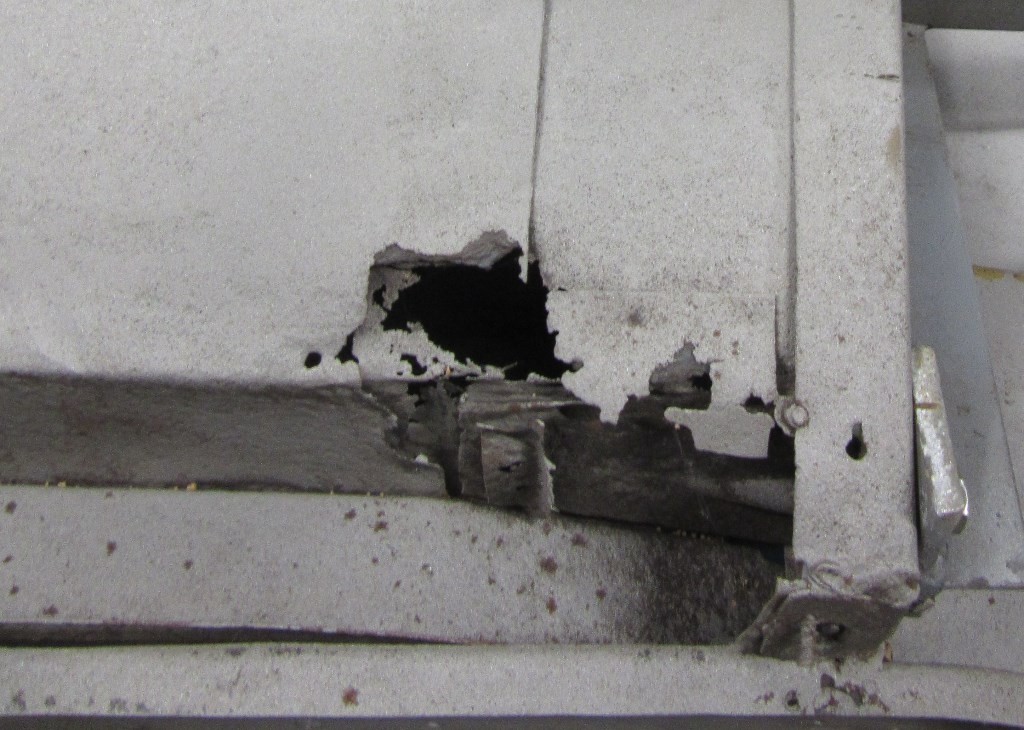
Photo 3 - shows the closing panel welded to the new inner sill. We sand blasted these bits and welded on the tabs at the rear ends, where they tend to rot.
|
|
Total posts: 6469
Last post: Sep 29, 2022 Member since:Nov 2, 2006
|
Cars in Garage: 4
Photos: 1354 WorkBench Posts: 2 |
|

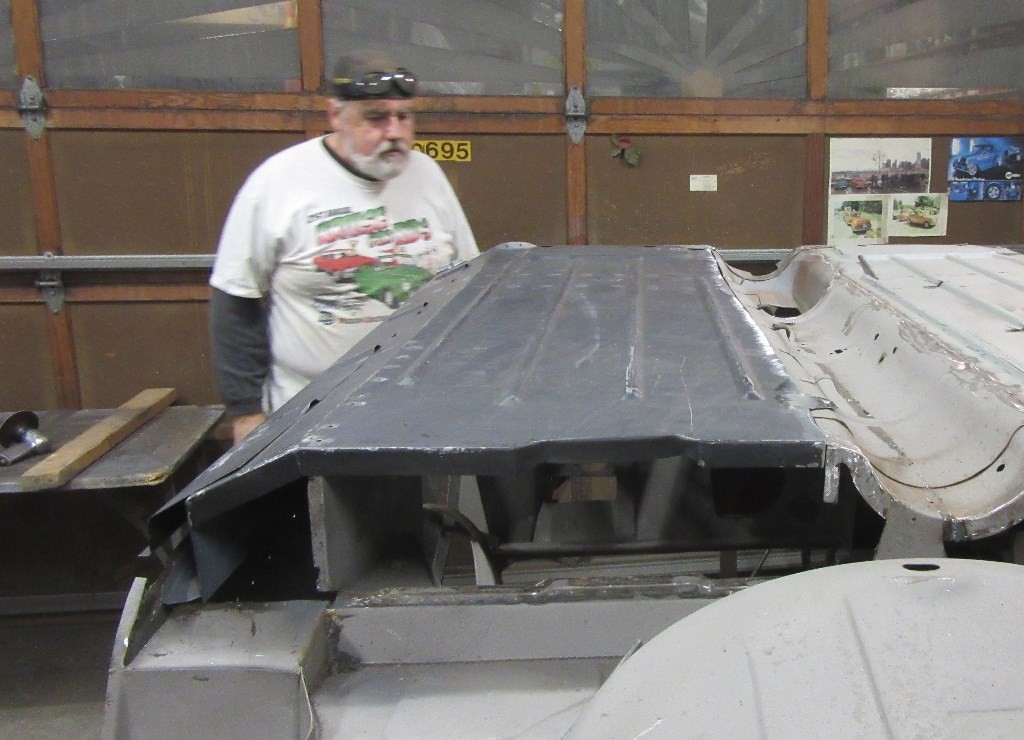
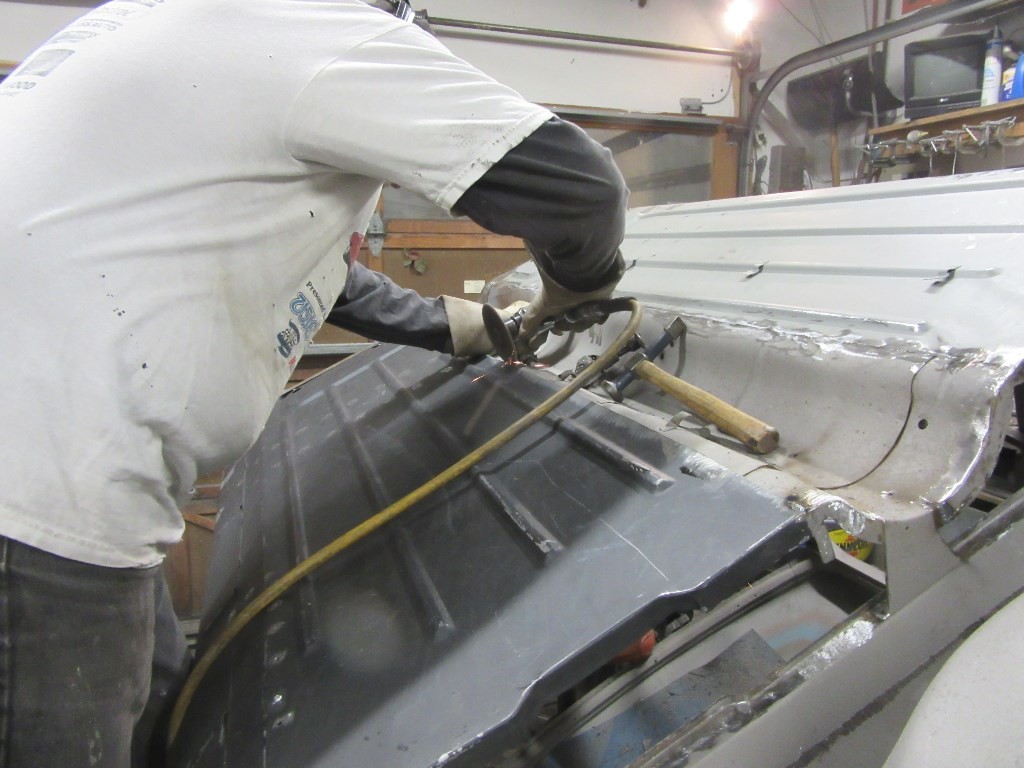
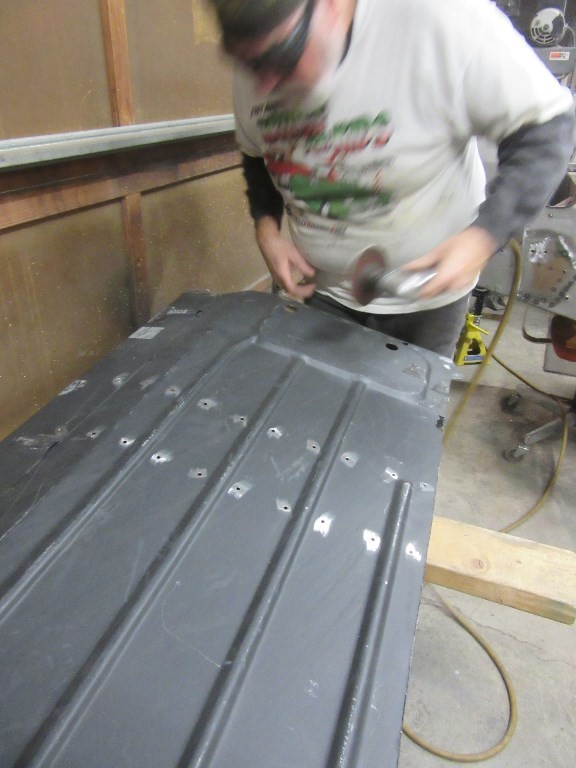
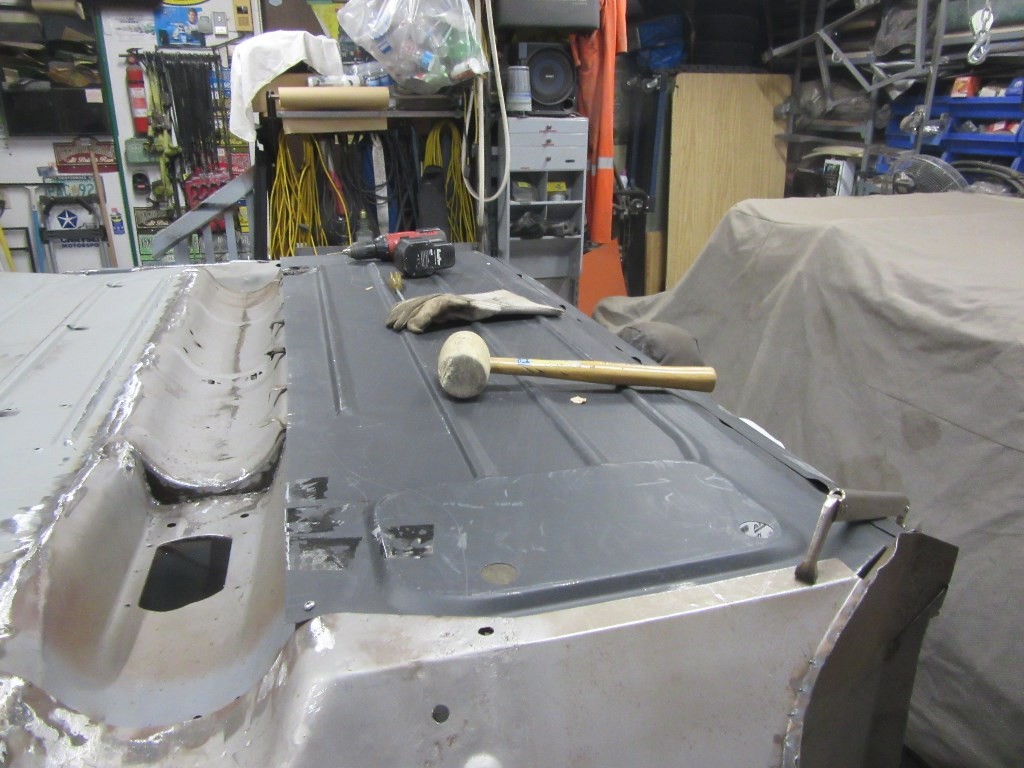
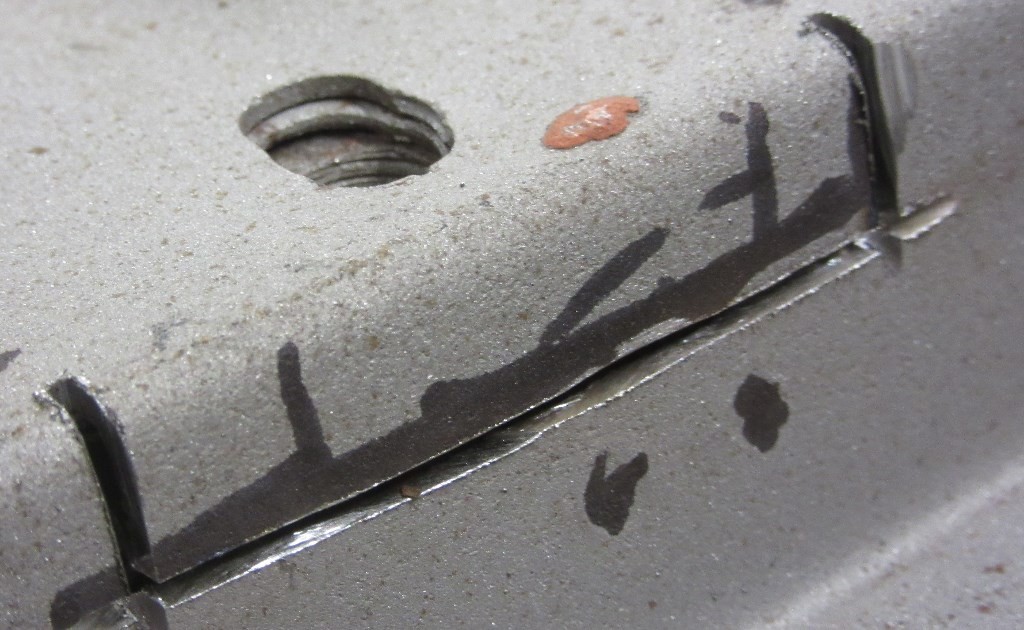
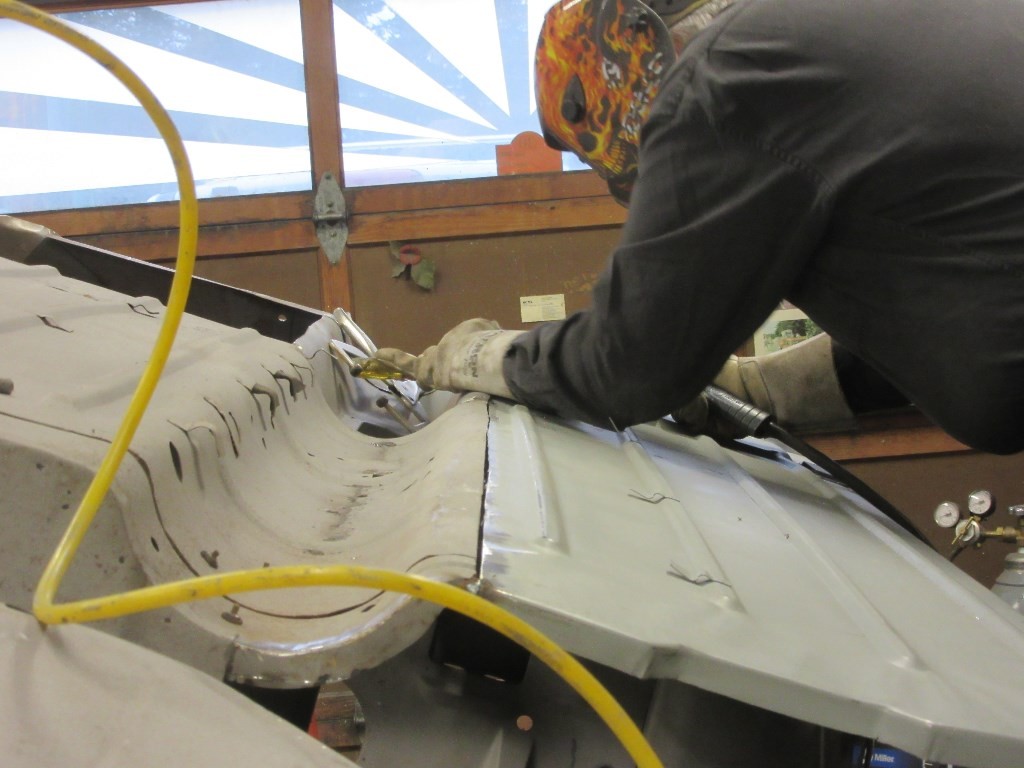
The important thing is to get the panel in place...and only then to mark the line between heel & toe board to cut off the excess - NO OVERLAP - except the two tabs to be used to sheet metal screw the panel in place...they are cut-off after panel is tacked in place).
In the 1st photo yiou can see a sheet metal screw near the toe & heel board as the fitting progresses.
In the 2nd photo you can see the rear tab with screw, and barely make out the tab left on up front.
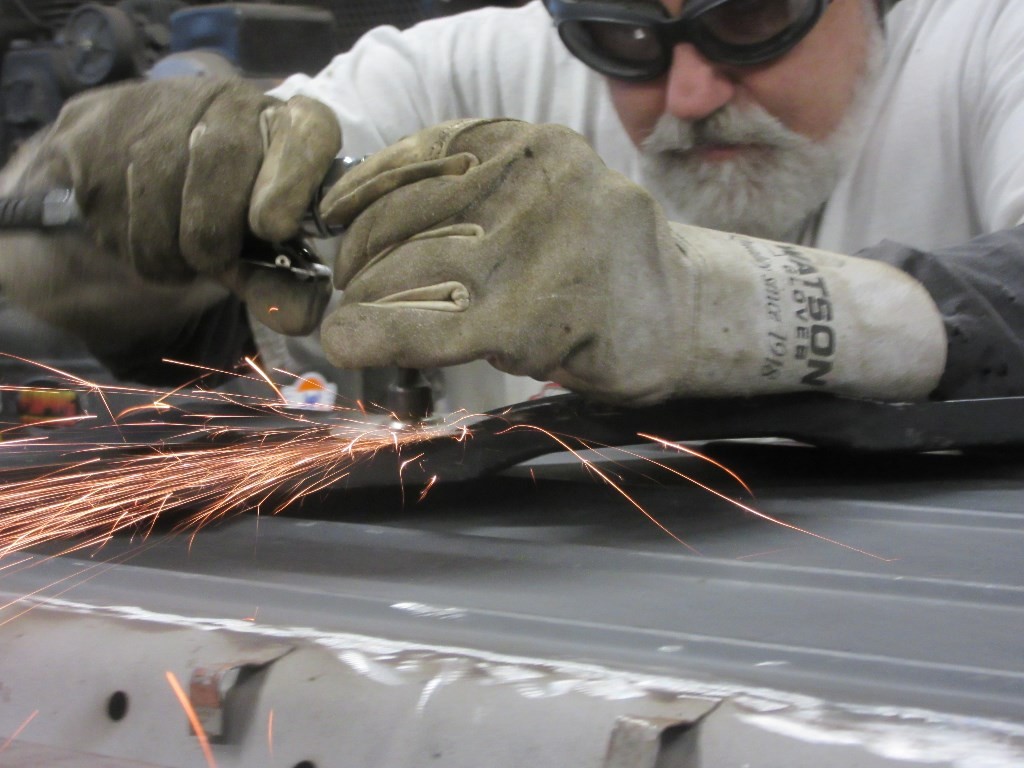
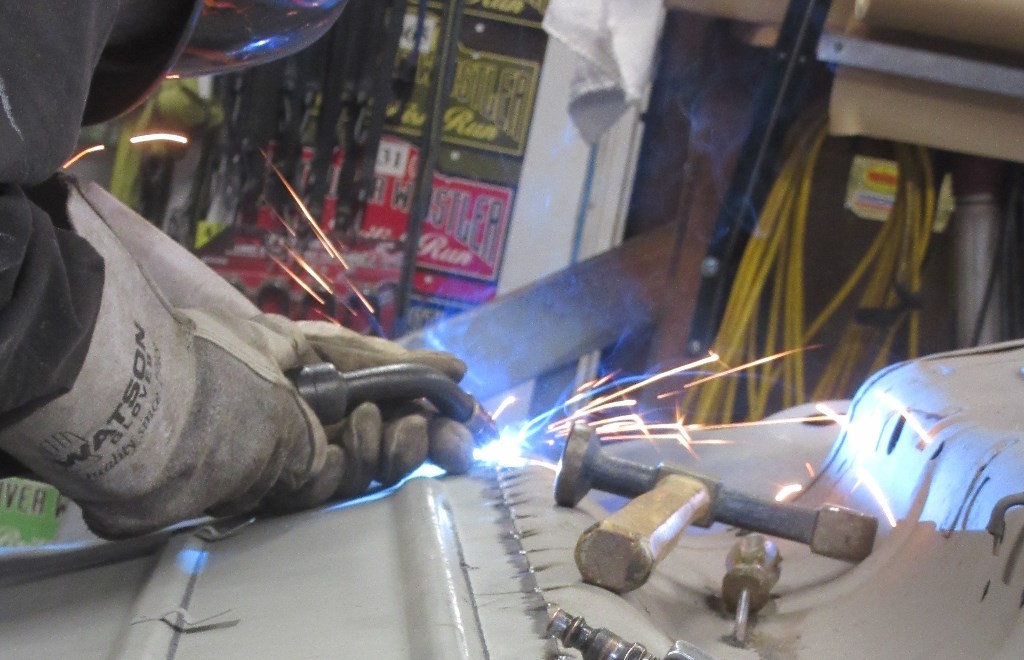
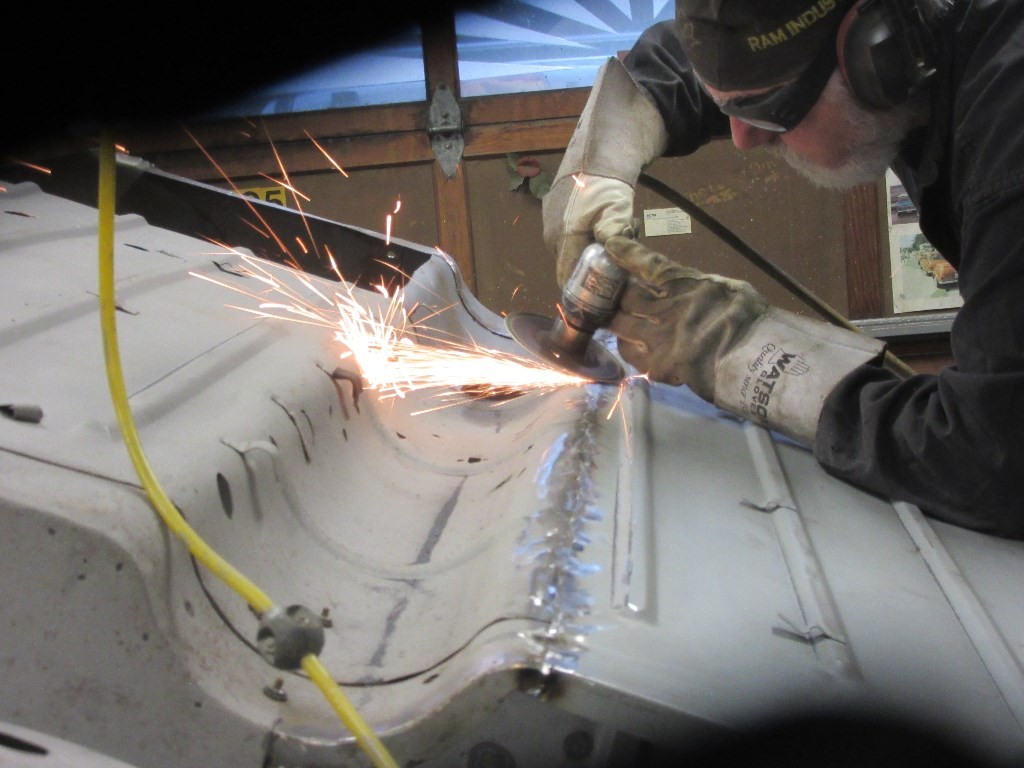
In the 3rd photo you can see that the tab at the rear has been removed, and the sander is cleaning up the cut floor for the continuous tack weklding...to be followed by the completion of the butt weld.
|
|
Total posts: 13978
Last post: Jan 15, 2024 Member since:Jan 22, 2003
|
Cars in Garage: 4
Photos: 381 WorkBench Posts: 1 |
|
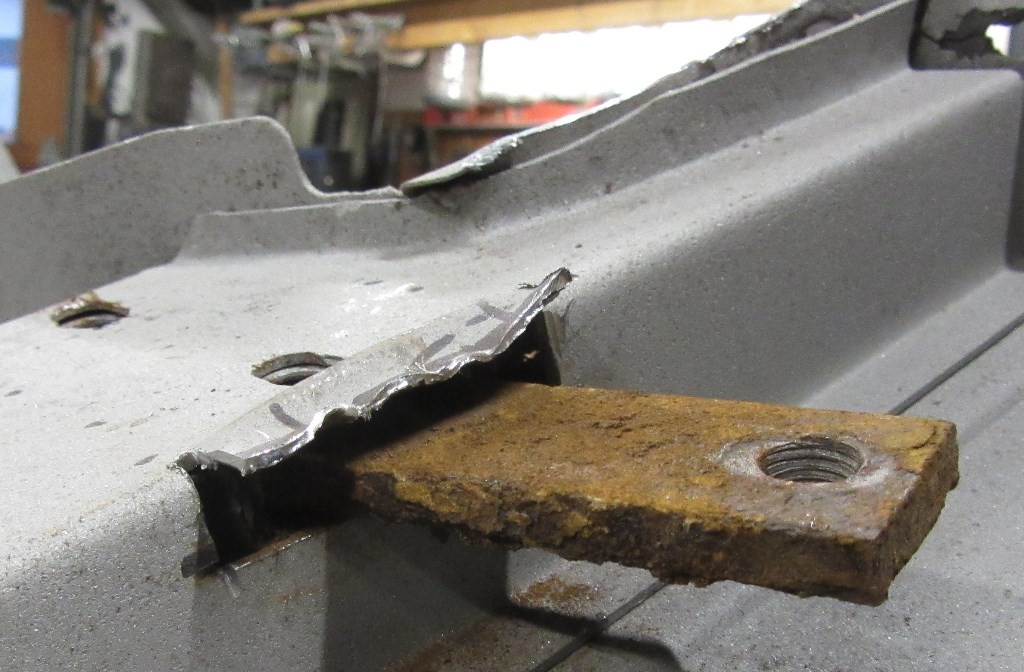
When you butt welded the half.....is that the length of it?
The fifth pic shows it in place overlapping the tunnel.....do you cut it back to weld?....trying to learn here as I'll be trying a similar job
"Everybody should own a MINI at some point, or you are incomplete as a human being" - James May
"WET COOPER", Partsguy1 (Terry Snell of Penticton BC ) - Could you send the money for the unpaid parts and court fees.
Ordered so by a Judge
|
|
Total posts: 6469
Last post: Sep 29, 2022 Member since:Nov 2, 2006
|
Cars in Garage: 4
Photos: 1354 WorkBench Posts: 2 |
|

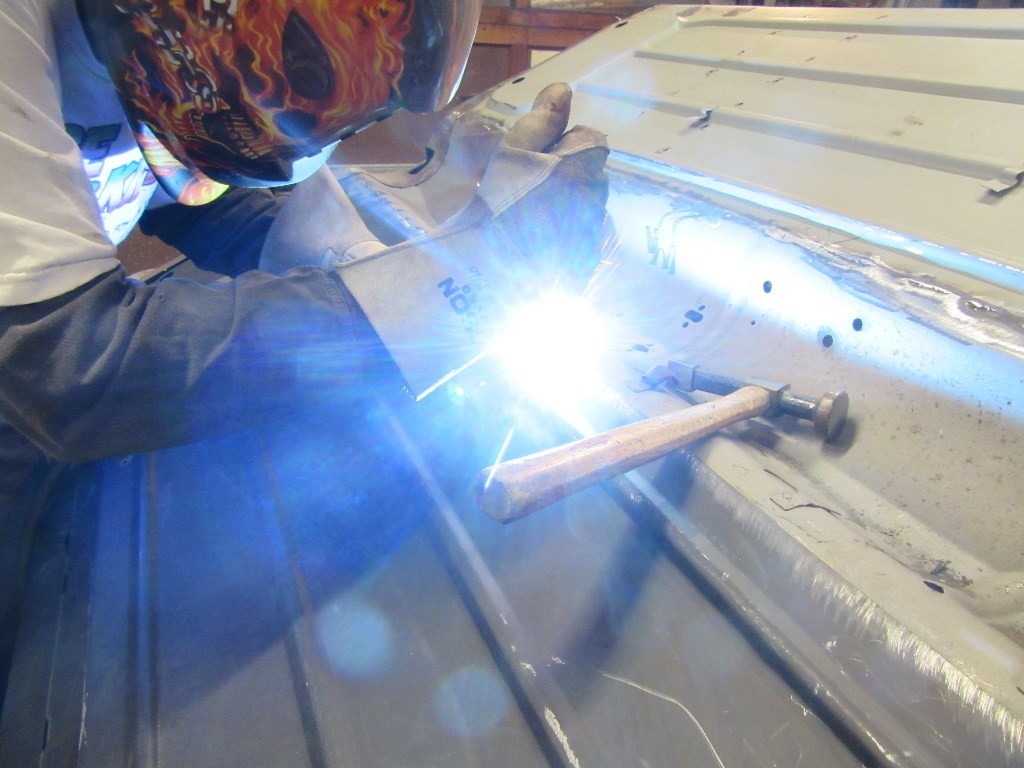
Another good half day in the garage...2nd half floor fitted, tack welded and butt welding being finished after I left the shop.
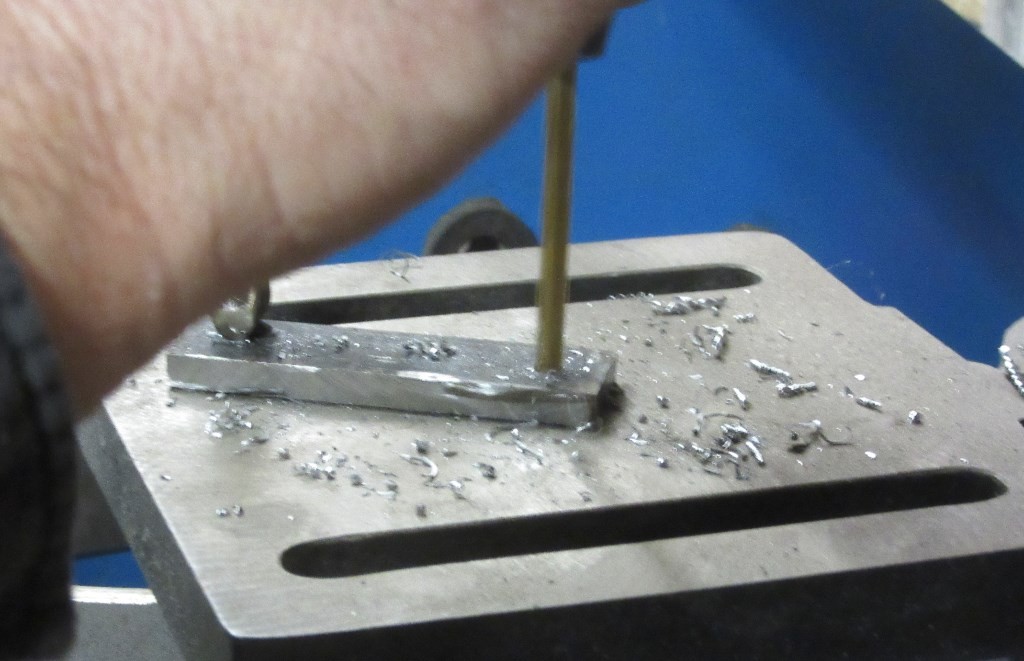
This morning I tapped the new rear sub frame mounting plate and it was installed in the channel and my mate John closed the channel up. Also saw John complete a small steel repair in the left rear, I got some blasting of shock mounts done after cleaning up the short clossing panel that got welded to the inner sill.
Heel board tomorrow...picked up grade 8 bolts, tension & lock washers and nuts today. New rear subbie will have Grade 8 fasteners and trunions with neoprene buushes to ensure proper location of the heel board.
|
|
Total posts: 9547
Last post: Apr 26, 2024 Member since:Aug 14, 2002
|
Cars in Garage: 0
Photos: 0 WorkBench Posts: 0 |
|
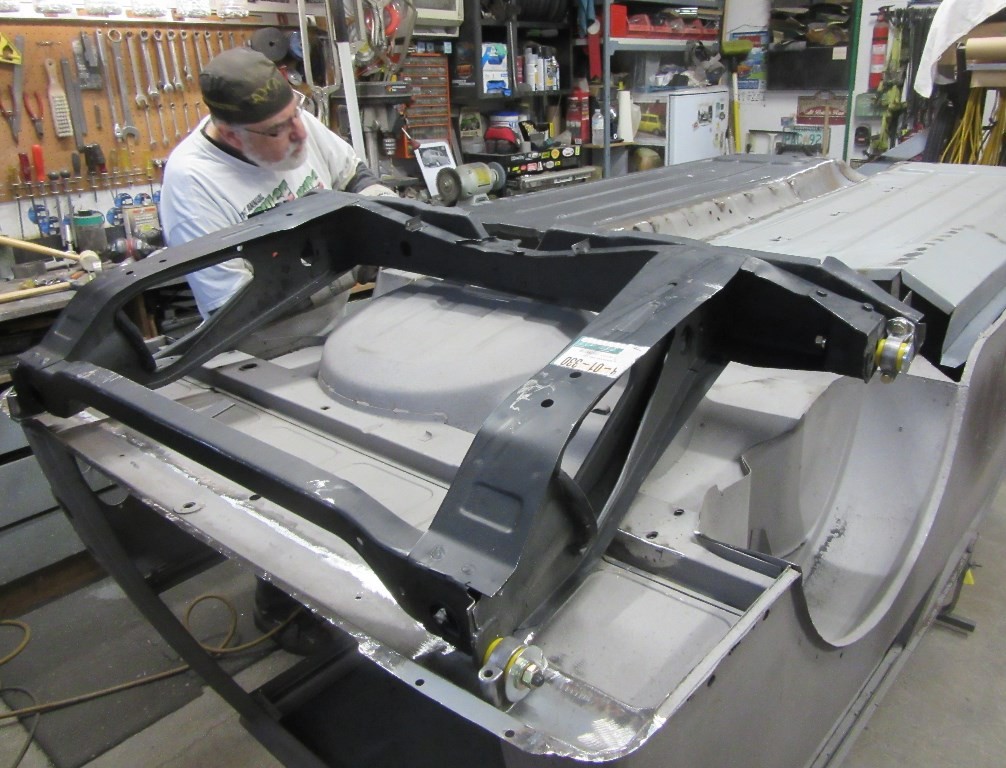
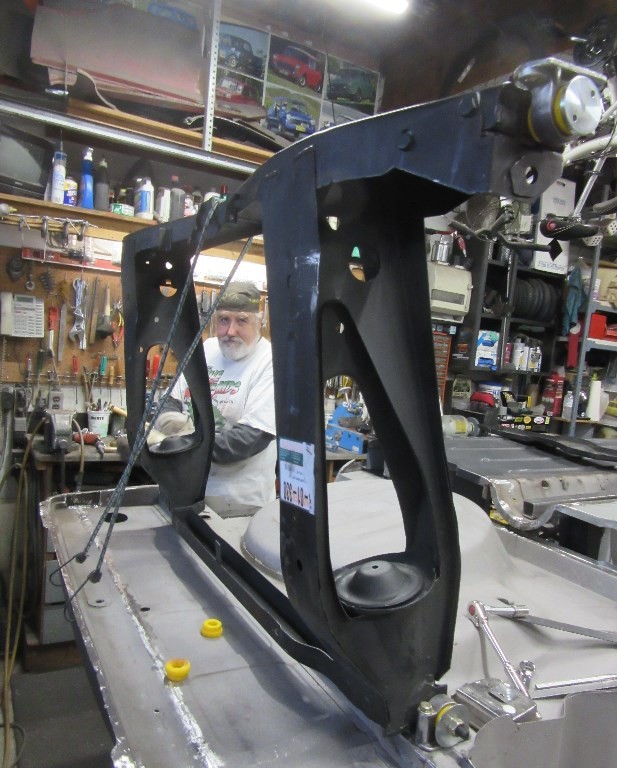
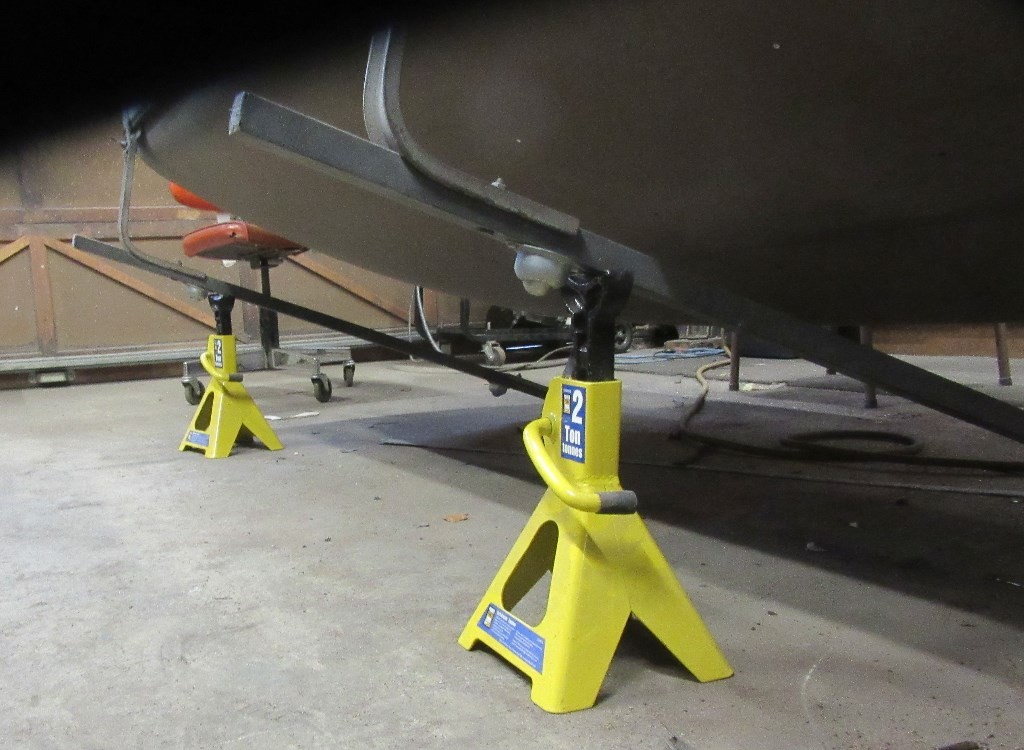
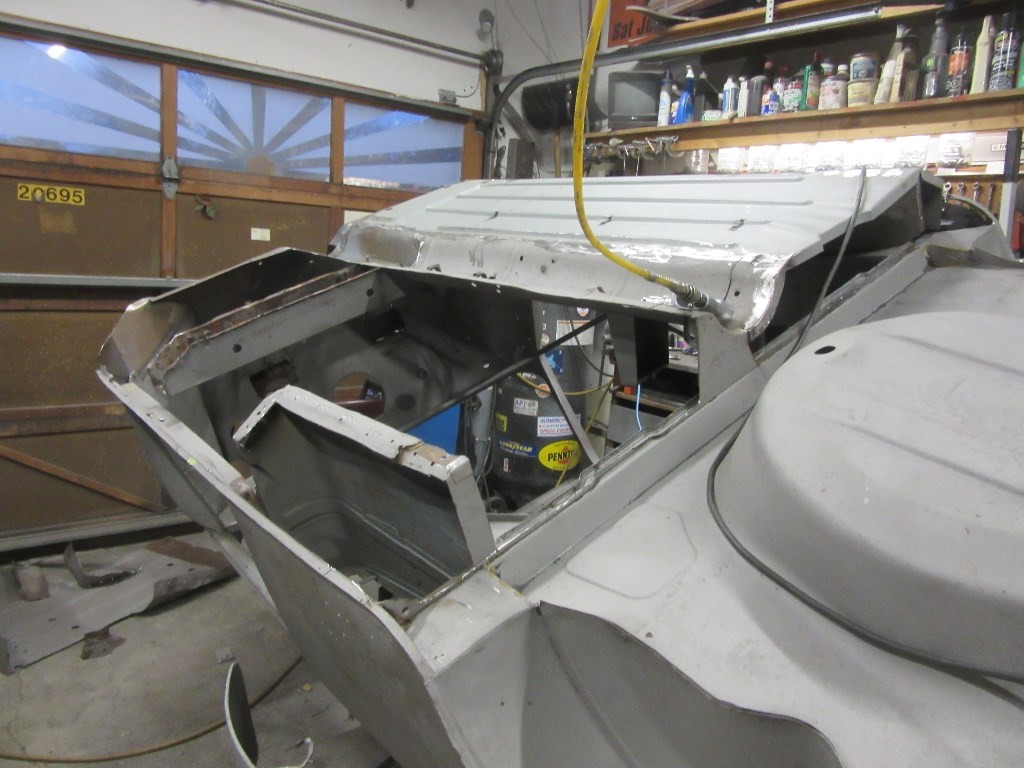
For you Dan. Simple system, no risk of damage to the smooth roof. The ball rollers are just to the left of the jackstands.
And, on DAY 3 we got the 1st full length half floor butt welded in and the other half floor removed...just as the delivery gal from Greyhound brought the right side floor, the 2 full length doorstep panels that extend from the A pillars to the rear wheel arches.
Also got some bits hidden inside for the 1293 power unit build...but that's another story.
Ahhhh...... I see! I had visions of a frame stationary on the floor with the rollers on top contacting the roof and allowing only the shell to be rolled on the curvature of the roof. I'll sleep better now!
.
"Hang on a minute lads....I've got a great idea."
|
|
Total posts: 13978
Last post: Jan 15, 2024 Member since:Jan 22, 2003
|
Cars in Garage: 4
Photos: 381 WorkBench Posts: 1 |
|
I was pretty lucky in that every one of my sub frame bolts...front and back...came out without a shear.
I did ![]() B blast them a couple times over a couple weeks prior
B blast them a couple times over a couple weeks prior
"Everybody should own a MINI at some point, or you are incomplete as a human being" - James May
"WET COOPER", Partsguy1 (Terry Snell of Penticton BC ) - Could you send the money for the unpaid parts and court fees.
Ordered so by a Judge
|
|
Total posts: 6469
Last post: Sep 29, 2022 Member since:Nov 2, 2006
|
Cars in Garage: 4
Photos: 1354 WorkBench Posts: 2 |
|
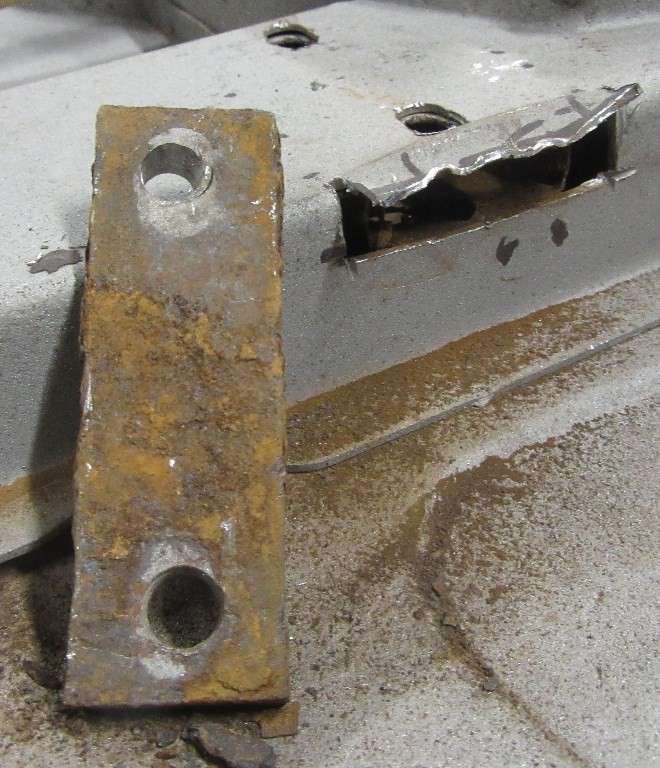
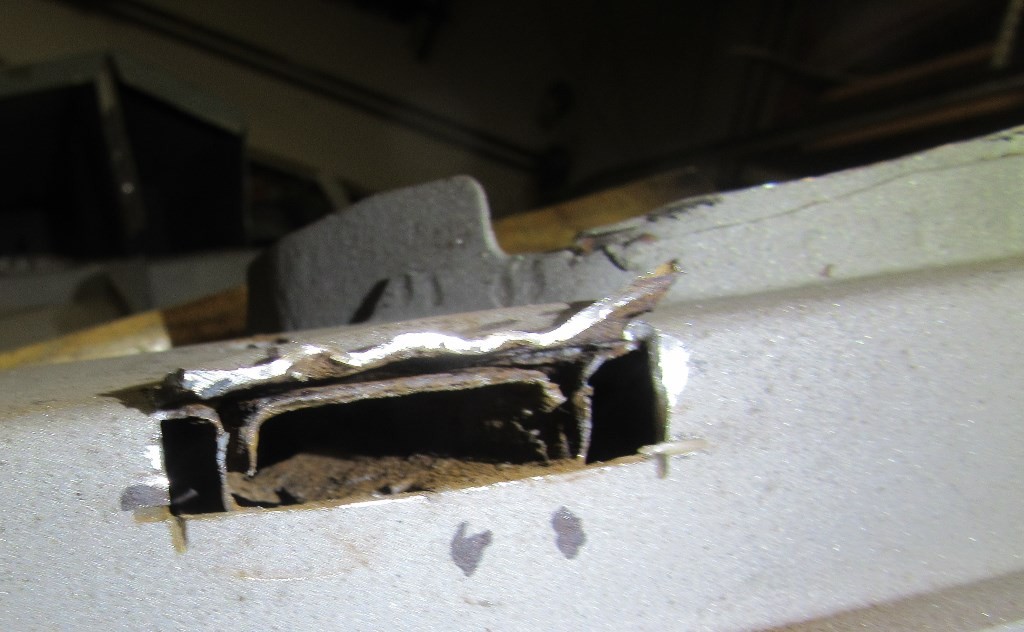

And...sometime way back in time a rear trunion bolt broke, the attempt to drill it out and following retap went askew.
Today, we opened up the rear channel holding the threaded captive plate on the lefthand side and extracted the old plate to make a new plate.
The righthand side was good....
Nonetheless, after paint, Waxoyl will flow freely in that closed up channel.
Tomorrow afternoon we start on the 2nd half floor.
|
|
Total posts: 13978
Last post: Jan 15, 2024 Member since:Jan 22, 2003
|
Cars in Garage: 4
Photos: 381 WorkBench Posts: 1 |
|
Thanks...I was just curious how much rot warrants replacing the whole thing.
I have some rot on the front floor and floor corners also, but the rear floor is good.
Mine being a van, I can imagine welding in a floor isn't very easy with the load bed covering the majority of the rear portion
"Everybody should own a MINI at some point, or you are incomplete as a human being" - James May
"WET COOPER", Partsguy1 (Terry Snell of Penticton BC ) - Could you send the money for the unpaid parts and court fees.
Ordered so by a Judge
|
|
Total posts: 6469
Last post: Sep 29, 2022 Member since:Nov 2, 2006
|
Cars in Garage: 4
Photos: 1354 WorkBench Posts: 2 |
|
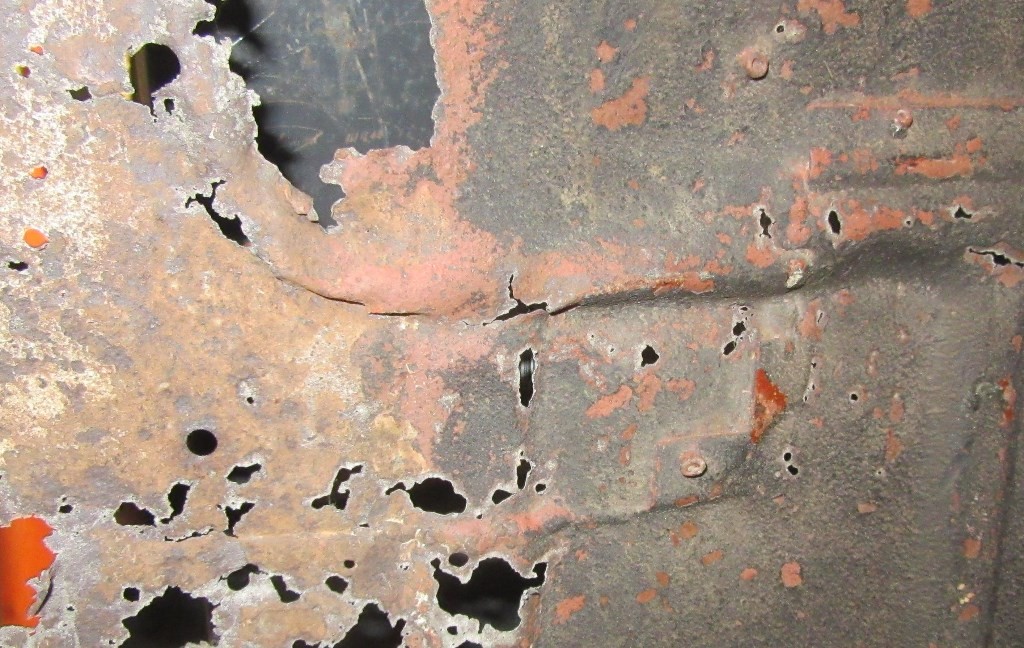
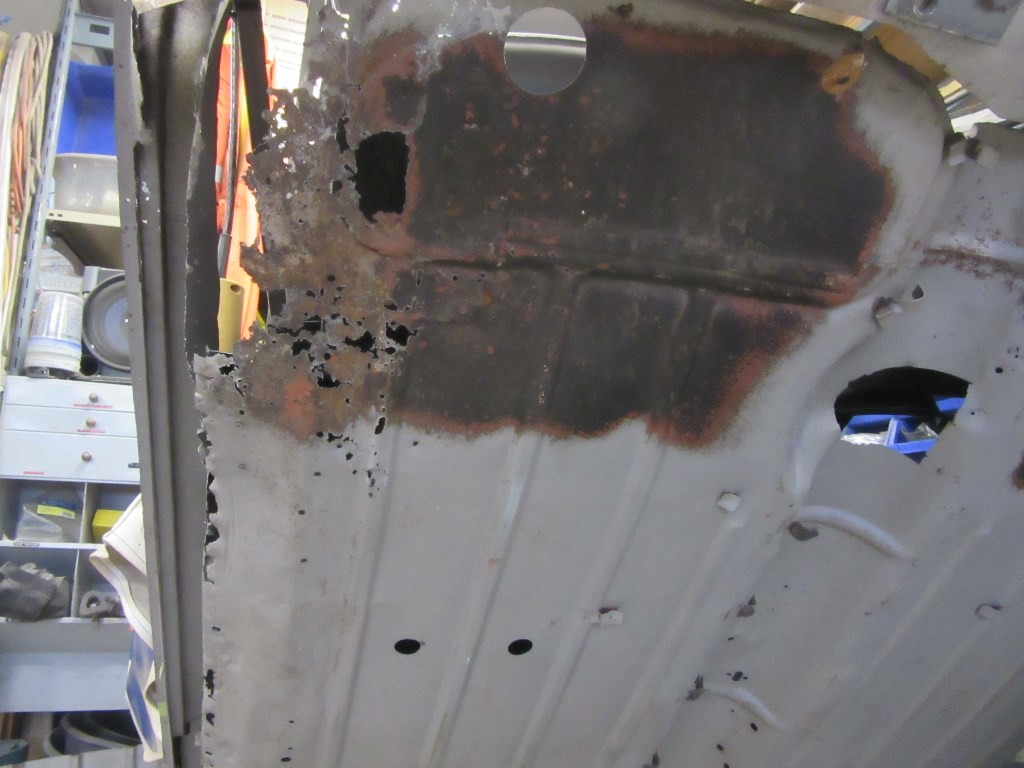
Spitz...see top right hand photo in post above for old right side and new left side floors (remember Mini is upside down). Both original floors were badly rotted up front, with some unhappiness in the rear halfs as well.
So new full length floor halfs retaining the original round tunnel from the front of the crossmember back (with rod change bit welded in from front of crossmember to toe board.
New full length doorstep panels - A pillars to rear wheel arches (will help address rear quarter issues) and new outer sills. Interestingly, the Woody had the later wider outer sills removed by the first resto work (evidence seen in the drilled out spot welds). First compromise using wider outer sills (result new Mk I sills go back to parts bin along with right front floor panel).
Photos of floors here too.
|
|
Total posts: 13978
Last post: Jan 15, 2024 Member since:Jan 22, 2003
|
Cars in Garage: 4
Photos: 381 WorkBench Posts: 1 |
|
Do you have a "before" picture of the floor Rick?
"Everybody should own a MINI at some point, or you are incomplete as a human being" - James May
"WET COOPER", Partsguy1 (Terry Snell of Penticton BC ) - Could you send the money for the unpaid parts and court fees.
Ordered so by a Judge
|
|
Total posts: 2022
Last post: Jan 14, 2022 Member since:Mar 8, 2002
|
Cars in Garage: 0
Photos: 1 WorkBench Posts: 1 |
|
nice work Rick ![]()
|
|
Total posts: 6469
Last post: Sep 29, 2022 Member since:Nov 2, 2006
|
Cars in Garage: 4
Photos: 1354 WorkBench Posts: 2 |
|

For you Dan. Simple system, no risk of damage to the smooth roof. The ball rollers are just to the left of the jackstands.
And, on DAY 3 we got the 1st full length half floor butt welded in and the other half floor removed...just as the delivery gal from Greyhound brought the right side floor, the 2 full length doorstep panels that extend from the A pillars to the rear wheel arches.
Also got some bits hidden inside for the 1293 power unit build...but that's another story.
|
|
Total posts: 9547
Last post: Apr 26, 2024 Member since:Aug 14, 2002
|
Cars in Garage: 0
Photos: 0 WorkBench Posts: 0 |
|
Roof racks (with ball rollers) & jack stands to elevate a side or end as need be.
Does that shell have a smooth roof (or ribbed)? I'd be really annoyed to get the whole body sorted, only to find roller grroves in the roof when it was turned over. But I suppose the empty, bare shell is pretty light and the old steel thicker and stronger... my daily driver has a few hail dimples in its roof.
.
"Hang on a minute lads....I've got a great idea."
|
|
Total posts: 6469
Last post: Sep 29, 2022 Member since:Nov 2, 2006
|
Cars in Garage: 4
Photos: 1354 WorkBench Posts: 2 |
|
Roof racks (with ball rollers) & jack stands to elevate a side or end as need be.


