
| Orig. Posting Date | User Name | Edit Date |
| Apr 17, 2016 12:43PM | Tagus | |
| Apr 16, 2016 05:39PM | MPlayle | Edited: Apr 16, 2016 05:39PM |
| Apr 16, 2016 01:21PM | Hunter2 | |
| Apr 16, 2016 09:59AM | malsal | |
| Apr 16, 2016 09:02AM | nkerr | |
| Apr 16, 2016 05:19AM | Hunter2 | |
| Apr 15, 2016 12:39PM | Hunter2 | |
| Apr 15, 2016 07:03AM | MPlayle | |
| Apr 15, 2016 06:29AM | Hunter2 | |
| Apr 14, 2016 09:48PM | SXSMAN | |
| Apr 14, 2016 01:49AM | nkerr | |
| Apr 13, 2016 07:41PM | Spitz | |
| Apr 13, 2016 04:05PM | MPlayle | |
| Apr 13, 2016 01:29PM | Hunter2 | |
| Apr 9, 2016 06:16PM | Hunter2 | |
| Apr 9, 2016 06:02PM | Spitz | |
| Apr 9, 2016 05:34PM | Hunter2 | |
| Apr 8, 2016 05:54AM | Hunter2 | |
| Apr 8, 2016 03:17AM | Dan Moffet | Edited: Apr 8, 2016 03:49AM |
| Apr 7, 2016 06:49PM | Ozmini |

|
Total posts: 438
Last post: Nov 13, 2022 Member since:Mar 27, 2002
|
Cars in Garage: 0
Photos: 15 WorkBench Posts: 0 |
|
I have the same kit from California. Do you mind keeping track of missing bits so I can save a little head scratching time when it's my turn to do this same job?
Ron

|
|
Total posts: 1787
Last post: Mar 26, 2024 Member since:Feb 1, 2000
|
Cars in Garage: 0
Photos: 0 WorkBench Posts: 0 |
|
From what I have heard from past acquaintances that still encounter the car in Colorado, it is holding up fine 14 years later.
|
|
Total posts: 6469
Last post: Sep 29, 2022 Member since:Nov 2, 2006
|
Cars in Garage: 4
Photos: 1354 WorkBench Posts: 2 |
|
Masal, there will be 'something' behind the wood. Looking at options for final install after Woody is painted.
|
|
Total posts: 8382
Last post: Jan 13, 2022 Member since:Feb 7, 2006
|
Cars in Garage: 0
Photos: 0 WorkBench Posts: 0 |
|
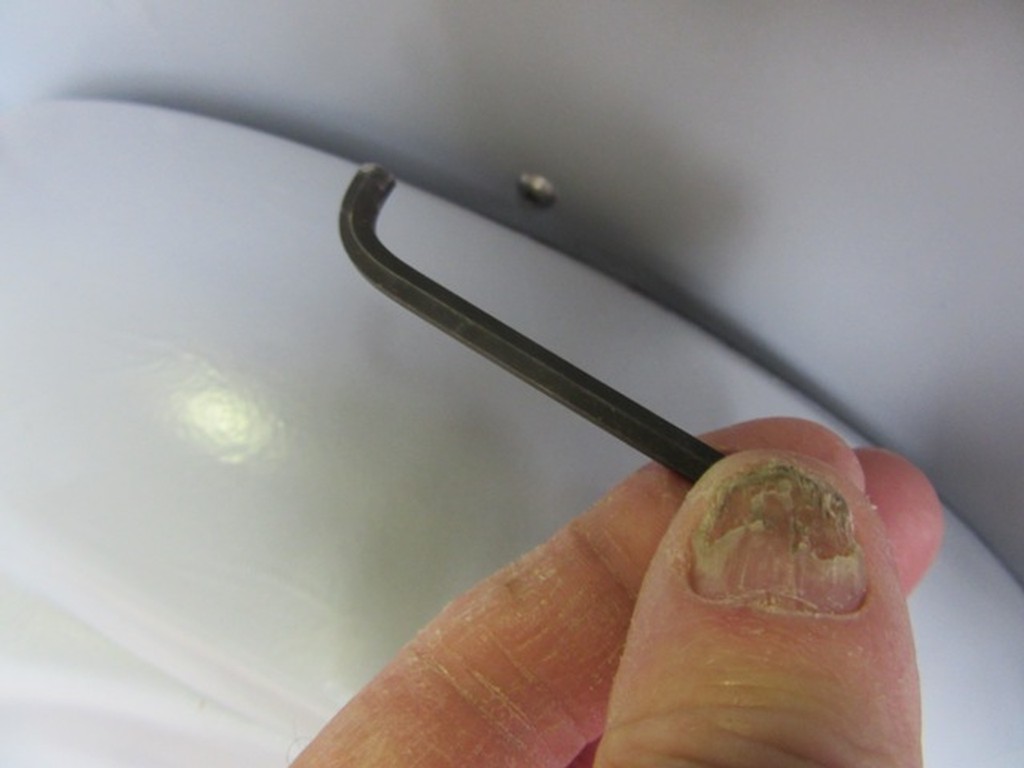
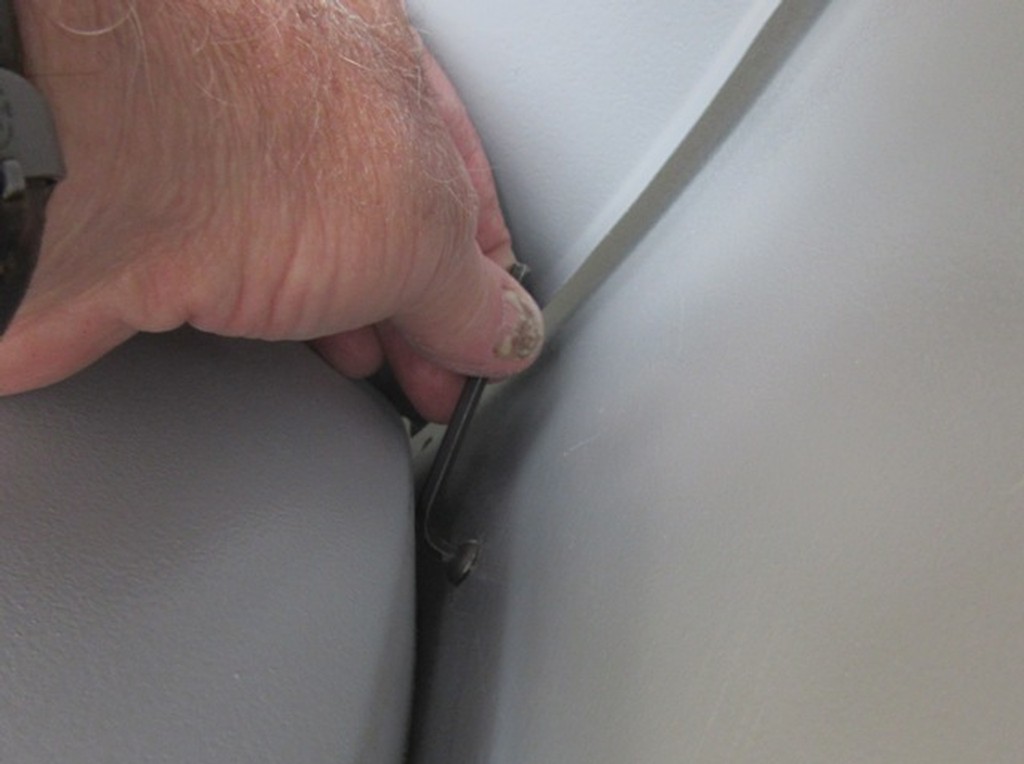
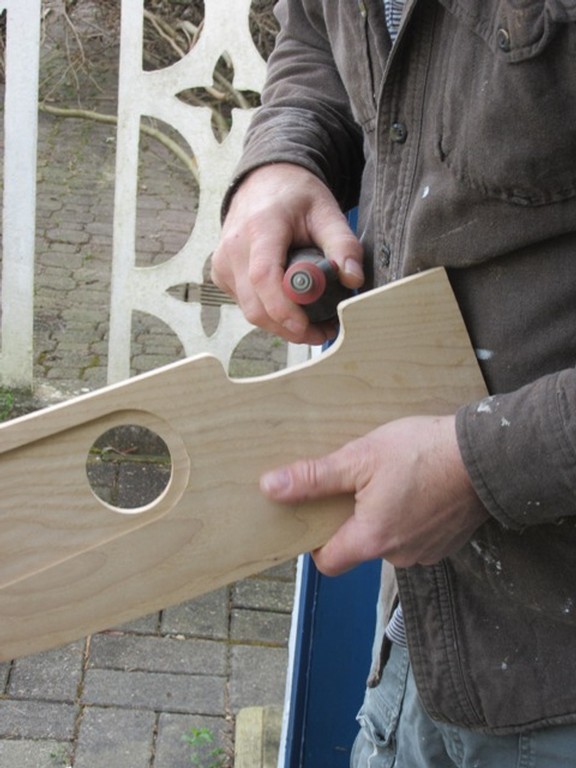
I made 2 SS studs that we locktited into the 2 worst locations. Still need to have some masking tape on the nut, but much quicker to get started.
And the SS bolts were not long enough to get through to the inserts in the short pcs. of Ash aft of the rear wheel arches. So, 4 longer SS bolts needed but the easiest to install. Sadly these pieces are so short and the mortise is so close to the hole in the steel that the brass insert caused the Ash to give way at the mortise on 1 pc....but repairable and completely out of sight.
One brass inserted went adrift in the Ash so withdrew it and epoxied it back in on the correct alignment.
If in doubt, flat out. Colin Mc Rae MBE 1968-2007.
Give a car more power and it goes faster on the straights,
make a car lighter and it's faster everywhere. Colin Chapman.
|
|
Total posts: 654
Last post: Dec 20, 2017 Member since:Sep 24, 2011
|
Cars in Garage: 0
Photos: 0 WorkBench Posts: 0 |
|
//www.walmart.com/ip/40859559?wmlspartner=wlpa&adid=22222222227028427498&wl0=&wl1=g&wl2=c&wl3=61186340169&wl4=&wl5=pla&wl6=96580666329&veh=sem
hex socket set, with spherical end for alignment flexibility
Norm
|
|
Total posts: 6469
Last post: Sep 29, 2022 Member since:Nov 2, 2006
|
Cars in Garage: 4
Photos: 1354 WorkBench Posts: 2 |
|
I made 2 SS studs that we locktited into the 2 worst locations. Still need to have some masking tape on the nut, but much quicker to get started.
And the SS bolts were not long enough to get through to the inserts in the short pcs. of Ash aft of the rear wheel arches. So, 4 longer SS bolts needed but the easiest to install. Sadly these pieces are so short and the mortise is so close to the hole in the steel that the brass insert caused the Ash to give way at the mortise on 1 pc....but repairable and completely out of sight.
One brass inserted went adrift in the Ash so withdrew it and epoxied it back in on the correct alignment.
|
|
Total posts: 6469
Last post: Sep 29, 2022 Member since:Nov 2, 2006
|
Cars in Garage: 4
Photos: 1354 WorkBench Posts: 2 |
|
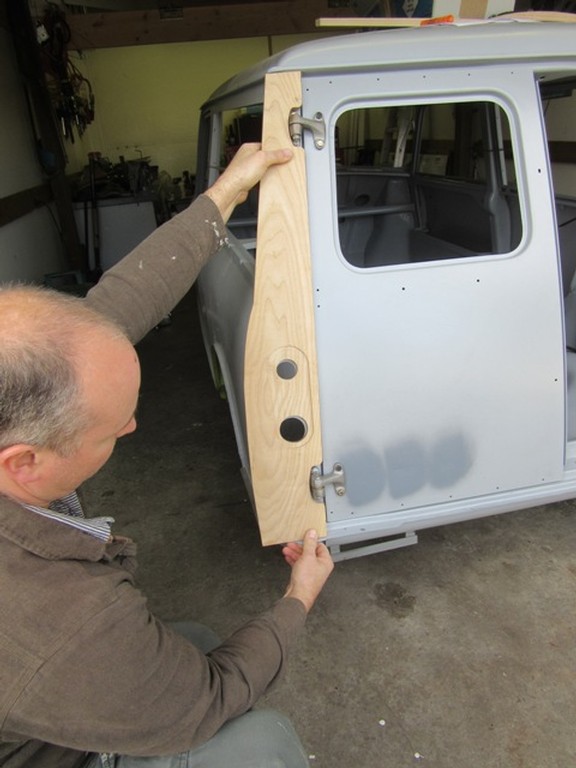
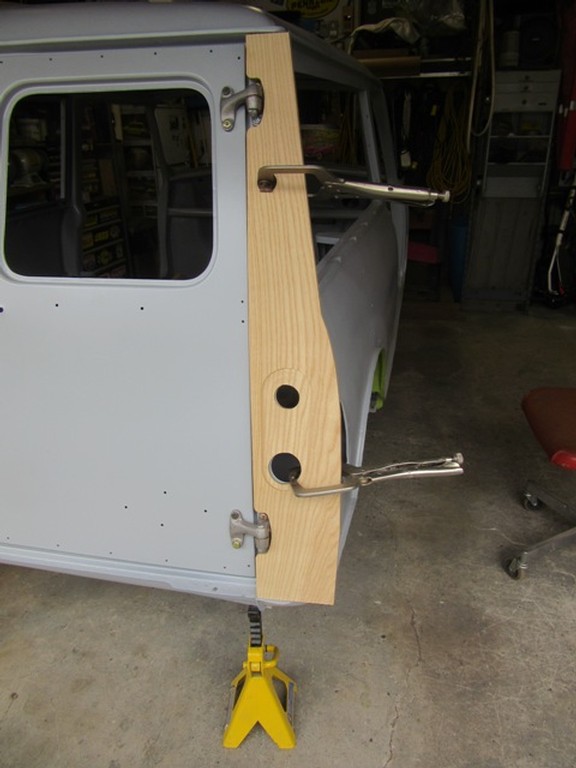
BUT...the good news is the broken joint has been fixed, angle corrected and all back together.
See photos!
|
|
Total posts: 1787
Last post: Mar 26, 2024 Member since:Feb 1, 2000
|
Cars in Garage: 0
Photos: 0 WorkBench Posts: 0 |
|
That kit assembles a lot different from the kit I installed years ago. The one I installed did not have the biscuit dowels for butt joints. The pieces on mine were notched to overlap.
|
|
Total posts: 6469
Last post: Sep 29, 2022 Member since:Nov 2, 2006
|
Cars in Garage: 4
Photos: 1354 WorkBench Posts: 2 |
|


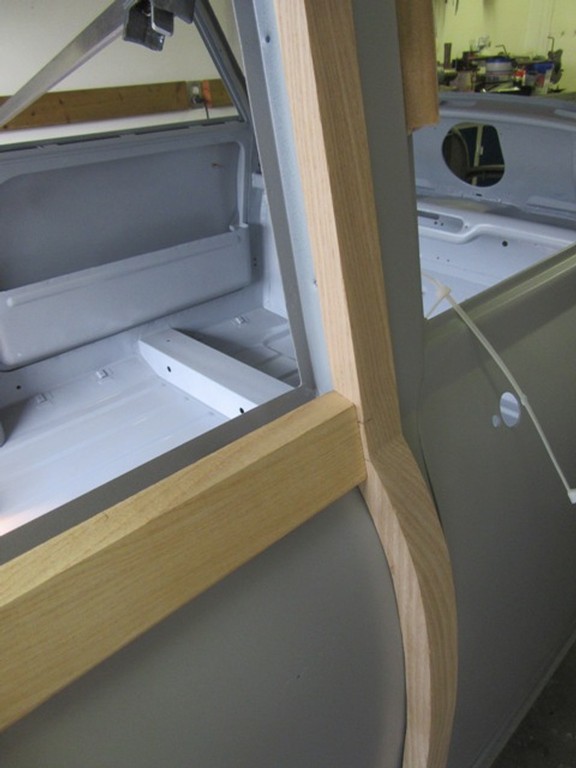
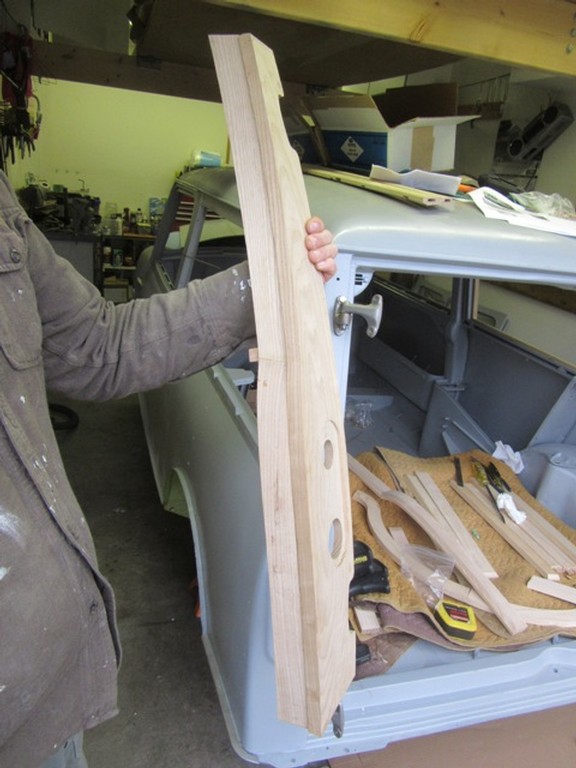
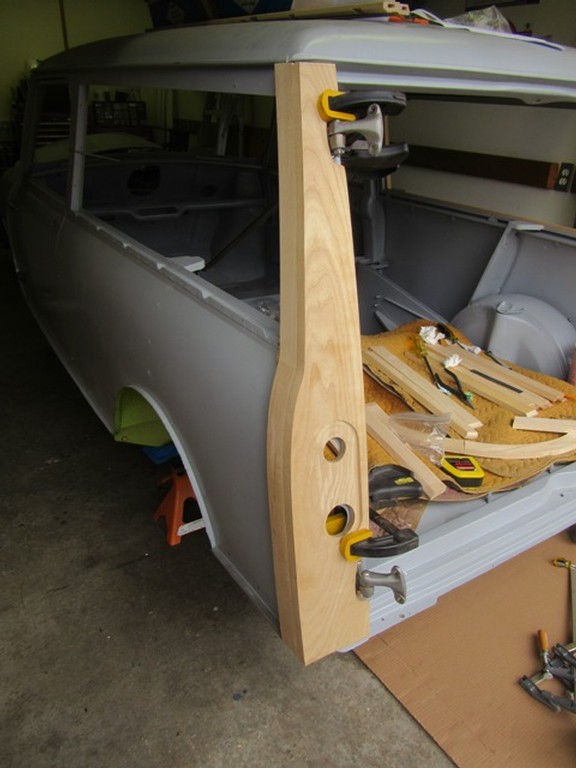
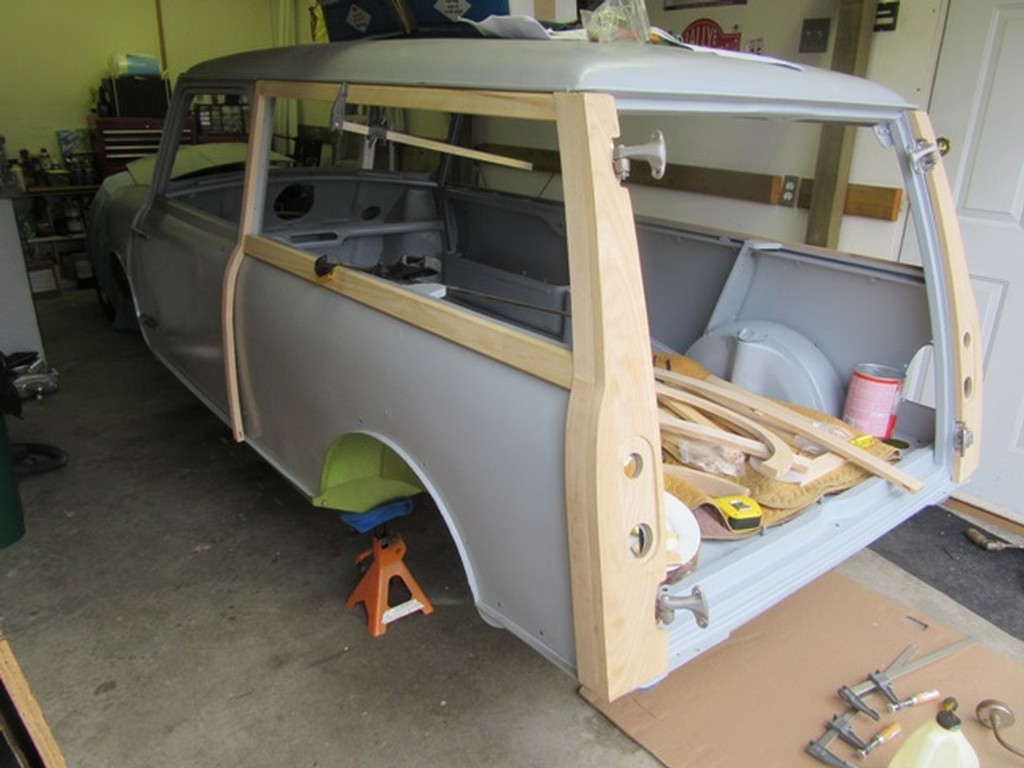
Having said that, the fitment has not been easy as much trimming (nibbling a little and retrying) has been necessary and we are not yet quite half done after a full day. Right hand side almost done. Then on to the left side this morning. We did fit the left rear piece after realizing that the new left rear steel section was off by a little bit needing to nibble at one of the hinge cut outs, then address the right side for symmetry.
However, wanting to get it right so we will persist.
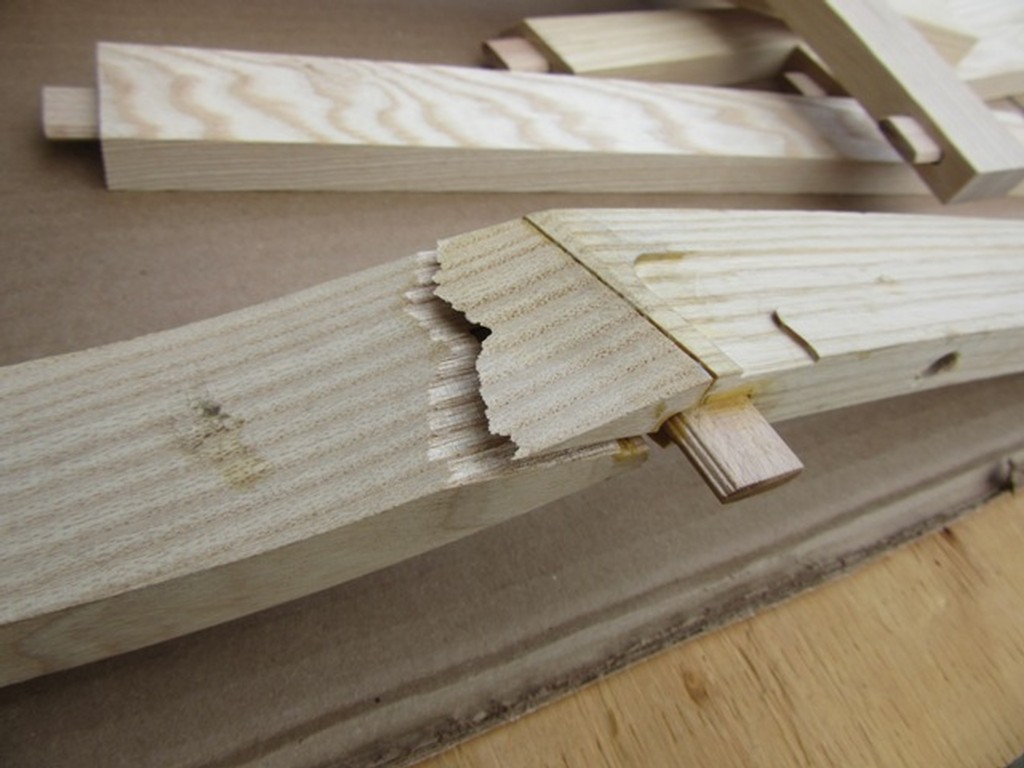
The only unhappiness was the joint that broke on the left side rear upright. The angle of the joint was way off...but my neighbour & wood pro says 'no worries'...and he hasn't been to Australia.
1) The wood pieces are general wider (rear uprights) and longer...except for the RH piece that runs along the lower lip back from the B pillar to the wheel arch...so we shortened both the upper & mid rails (bracketing the rear window opening.
2) Consequently there is some wood removal to the top but more likely bottom of uprights and from the rear door opening and outside edges...all before any rounding or shaping of corners, joins etc. The two photos of the right rear show the excess and the result once the two pieces are screwed together & trimmed.
|
|
Total posts: 1125
Last post: Nov 6, 2019 Member since:Jan 27, 2014
|
Cars in Garage: 0
Photos: 0 WorkBench Posts: 0 |
It's great to see some color on the ole girl.
Love your updates. Thanks for saving another one Rick.
|
|
Total posts: 654
Last post: Dec 20, 2017 Member since:Sep 24, 2011
|
Cars in Garage: 0
Photos: 0 WorkBench Posts: 0 |
|
Pretty sure that he meant to fit the wood before paint, and then remove it for paint (so all of the metal surfaces are coated), and then re-fit the wood afterwards.
N
|
|
Total posts: 13978
Last post: Jan 15, 2024 Member since:Jan 22, 2003
|
Cars in Garage: 4
Photos: 381 WorkBench Posts: 1 |
|
Fit wood BEFORE paint so as not to scuff things up afterwards.
Body/paint man will want to see any bad fit before starting his work.
Rick/Hunter2
I'm asking, as a friend will be doing the same this summer and want to pass on info.
"Everybody should own a MINI at some point, or you are incomplete as a human being" - James May
"WET COOPER", Partsguy1 (Terry Snell of Penticton BC ) - Could you send the money for the unpaid parts and court fees.
Ordered so by a Judge
|
|
Total posts: 1787
Last post: Mar 26, 2024 Member since:Feb 1, 2000
|
Cars in Garage: 0
Photos: 0 WorkBench Posts: 0 |
|
Making the trial fit prior to painting is the very best approach.
The wood pieces are very much right or left handed. The one piece you show on the right rear is actually for the left rear. The recess in the wood that appears to be for the tail light is actually to fit OVER the raised part of the metal seat for the tail light. The outer edges of that piece "should" be slightly rounded and the crisp edges go against the car.
When I put the wood kit on a 1970 Clubman Estate years ago, the pieces for a given side were supposed to be assembled into a single unit prior to actually being fitted to the car. This meant carefully determining the right side pieces from the left and then figuring out how to "tape" them together for the first trial fitting. Once on the car in that fitting, you mark the alignment of the tabs for securing the pieces to each other so you can recreate that alignment and secure the pieces together from the backside with the very small wood screws in the mounting kit. Make a second trial fit to verify. Then take it all apart again and apply your desired finish to all sides of the wood. Once all the individual pieces are finished, re-assemble and do one more trial fit. Stow the assembled sections aside and have the car painted, then make the final fitment of the wood kit.
|
|
Total posts: 6469
Last post: Sep 29, 2022 Member since:Nov 2, 2006
|
Cars in Garage: 4
Photos: 1354 WorkBench Posts: 2 |
|
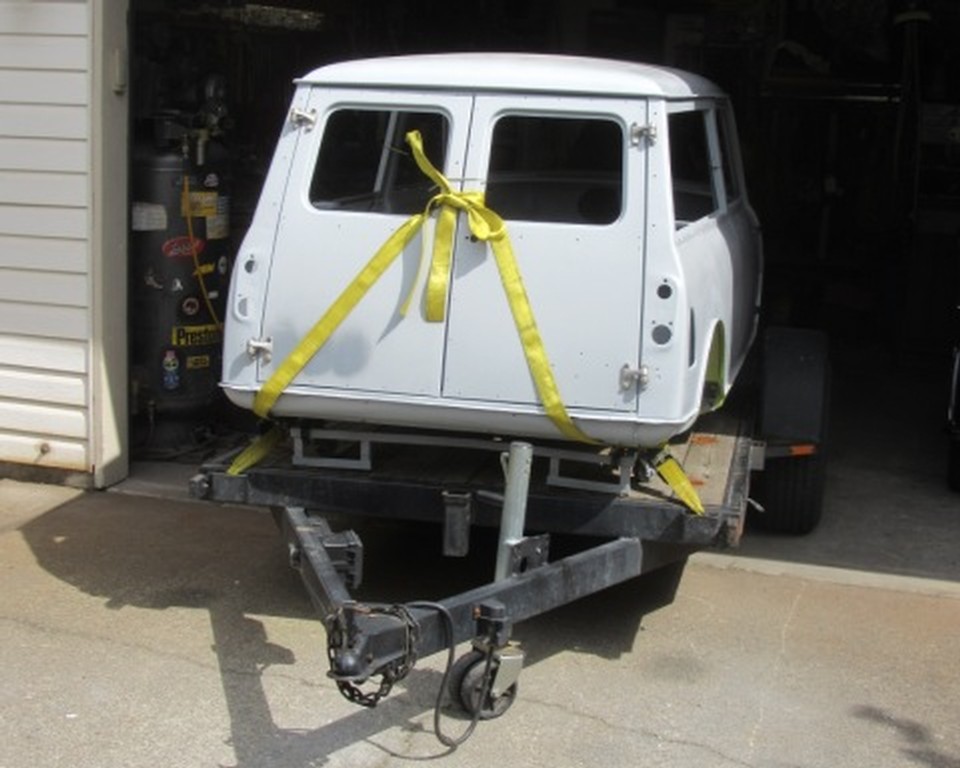
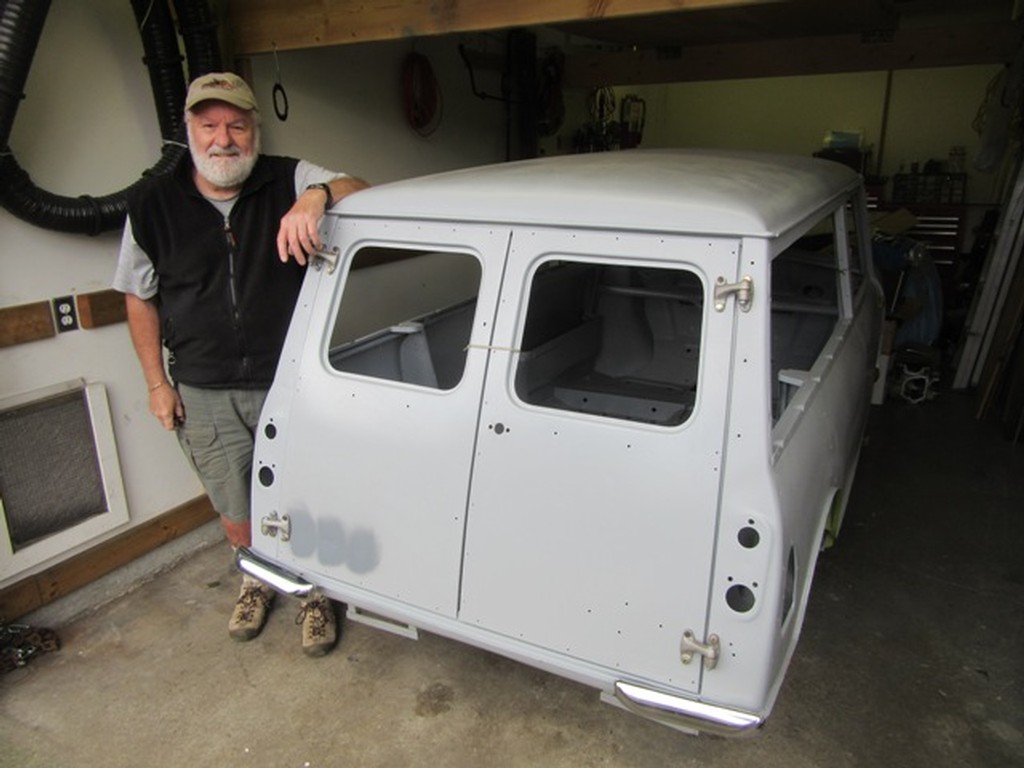
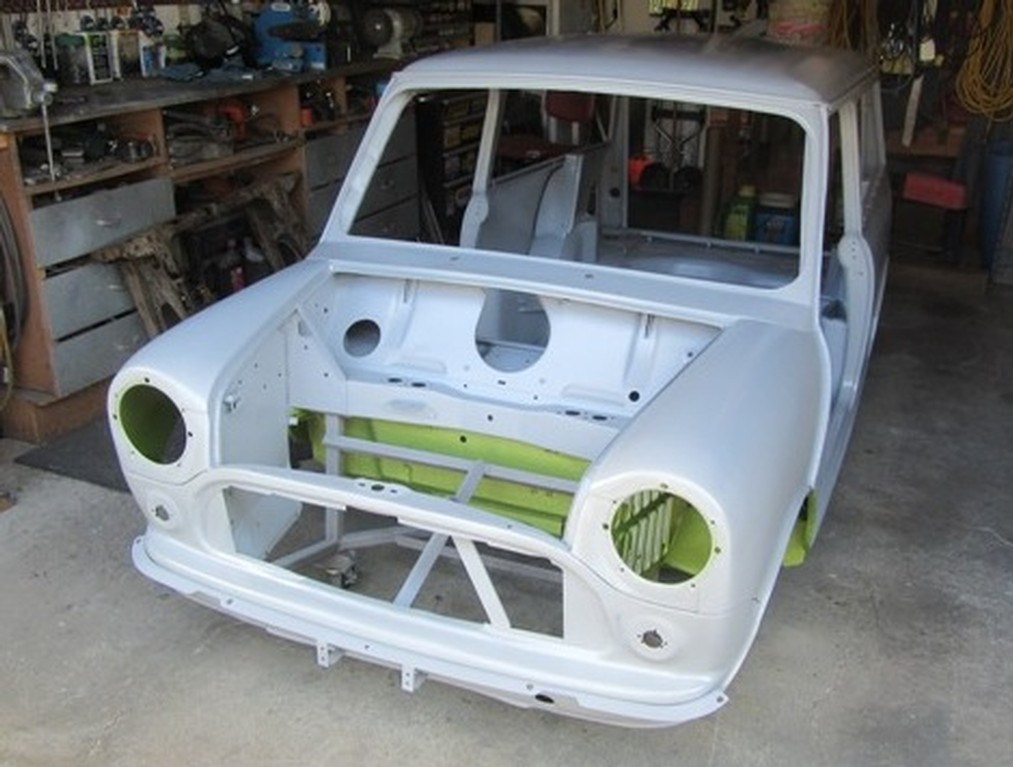
Today, LUCKY came home...out of the metal lab, for the wood fitting to begin. Happy to be at this stage!
|
|
Total posts: 6469
Last post: Sep 29, 2022 Member since:Nov 2, 2006
|
Cars in Garage: 4
Photos: 1354 WorkBench Posts: 2 |
|
Fit wood BEFORE paint so as not to scuff things up afterwards.
Body/paint man will want to see any bad fit before starting his work.
Rick/Hunter2
|
|
Total posts: 13978
Last post: Jan 15, 2024 Member since:Jan 22, 2003
|
Cars in Garage: 4
Photos: 381 WorkBench Posts: 1 |
|
"Everybody should own a MINI at some point, or you are incomplete as a human being" - James May
"WET COOPER", Partsguy1 (Terry Snell of Penticton BC ) - Could you send the money for the unpaid parts and court fees.
Ordered so by a Judge
|
|
Total posts: 6469
Last post: Sep 29, 2022 Member since:Nov 2, 2006
|
Cars in Garage: 4
Photos: 1354 WorkBench Posts: 2 |
|
|
|
Total posts: 6469
Last post: Sep 29, 2022 Member since:Nov 2, 2006
|
Cars in Garage: 4
Photos: 1354 WorkBench Posts: 2 |
|
|
|
Total posts: 9547
Last post: Apr 26, 2024 Member since:Aug 14, 2002
|
Cars in Garage: 0
Photos: 0 WorkBench Posts: 0 |
|
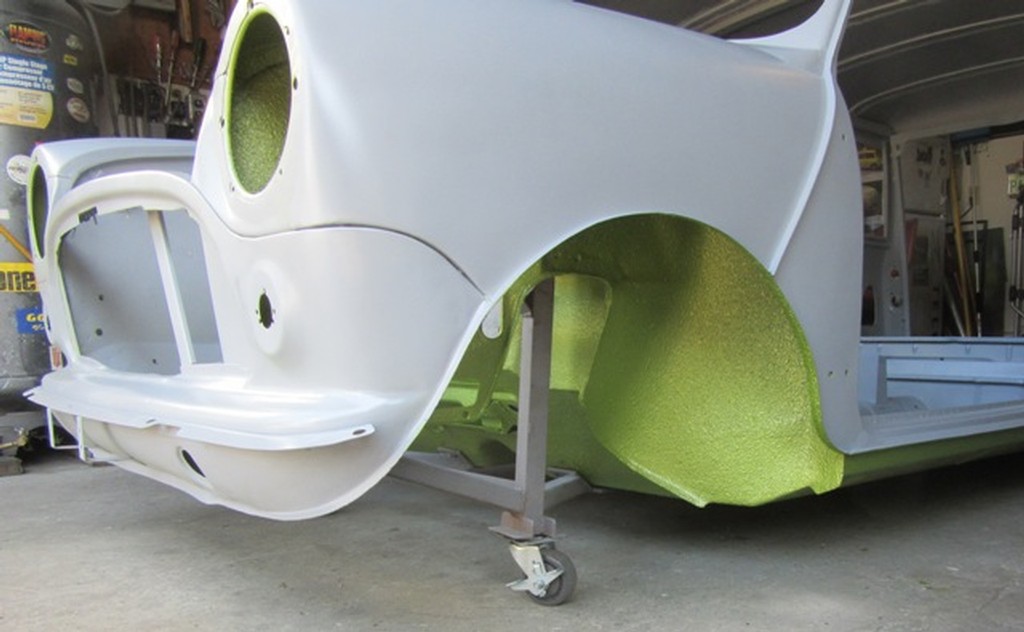
What colour for the upper portions? You only mentioned the green for the "bottom".
I wonder if you'd get grief from amphibian lovers and sod-layers shouting "green side up!"
BTW. I LIKE it!
.
"Hang on a minute lads....I've got a great idea."
|
|
Total posts: 12
Last post: Apr 7, 2016 Member since:Oct 14, 2011
|
Cars in Garage: 0
Photos: 0 WorkBench Posts: 0 |


